Adding bank details in Vinimay Accounting Software is a simple process that allows businesses to display their bank account information on invoices. If you want to add bank details in Vinimay, you can do so through the Settings section. This step-by-step guide explains how to add your bank account information and verify that the details appear correctly on your invoices, with screenshots for every important step.
How to Add Bank Details in Vinimay?
To add bank details in Vinimay, log in to your account, open the Dashboard, and navigate to Settings → Banks → Add Bank Details. Select your company, enter your bank information, and click Create Bank Detail. After saving, you can verify the bank information by opening an invoice preview from the Transactions section.
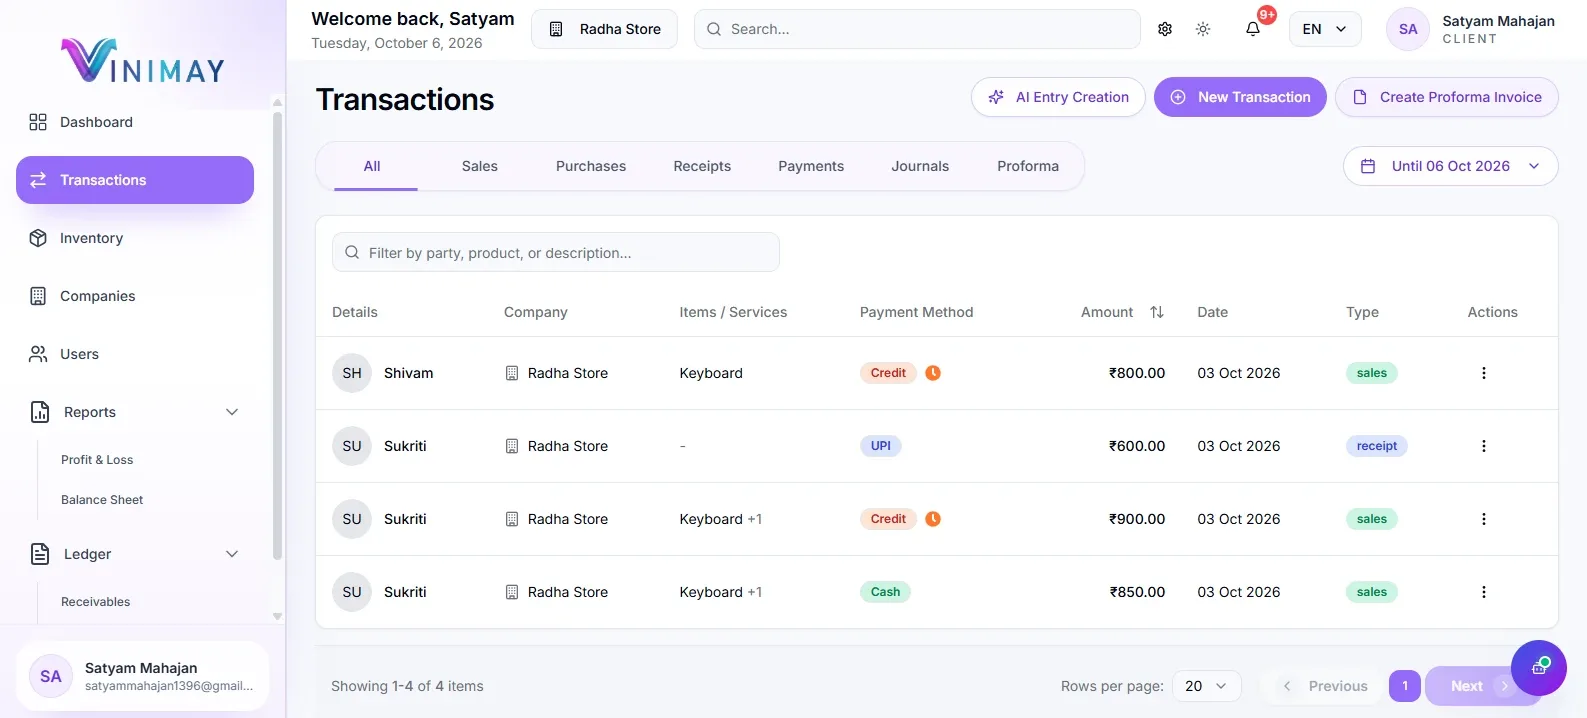
Step 1: Log in to Your Vinimay Account
First, open Vinimay Accounting Software and log in using your registered credentials.
After successfully logging in, you will be redirected to the Vinimay Dashboard.
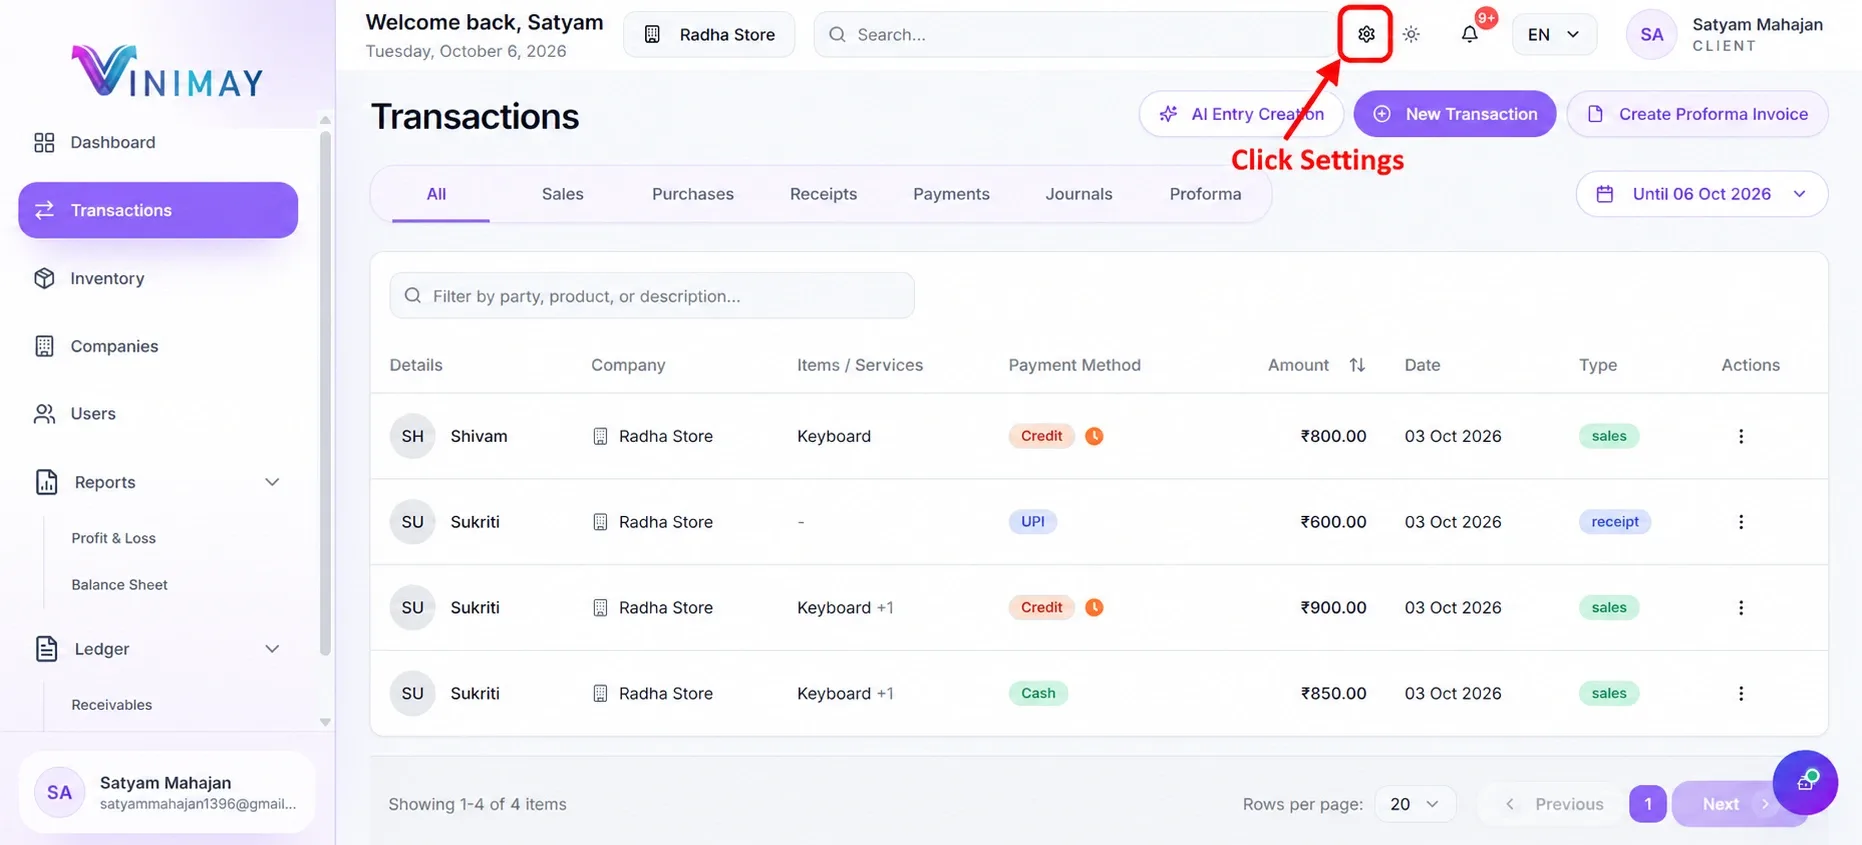
On the dashboard, locate the Settings button in the Quick Actions section or use the Settings icon in the top navigation.
Click Settings to continue.
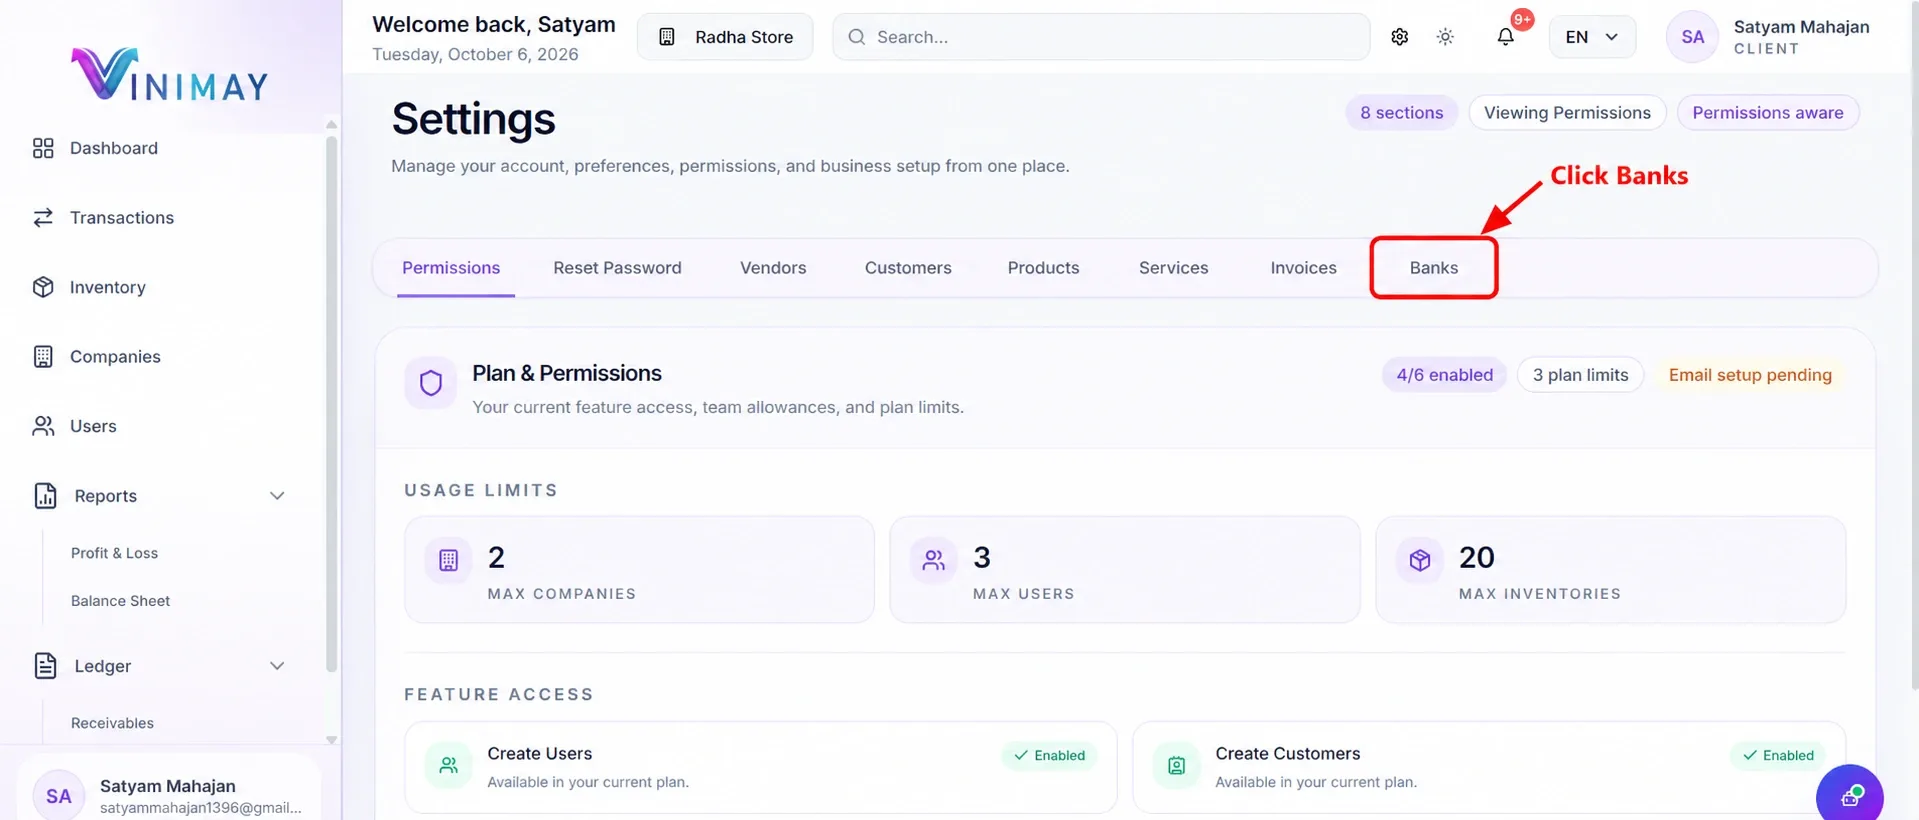
Step 2: Open the Banks Section
After clicking Settings, the Settings page will open.
You will see different options, including Permissions, Reset Password, Vendors, Customers, Products, Services, Invoices, and Banks.
Click the Banks tab to manage your business bank account information.
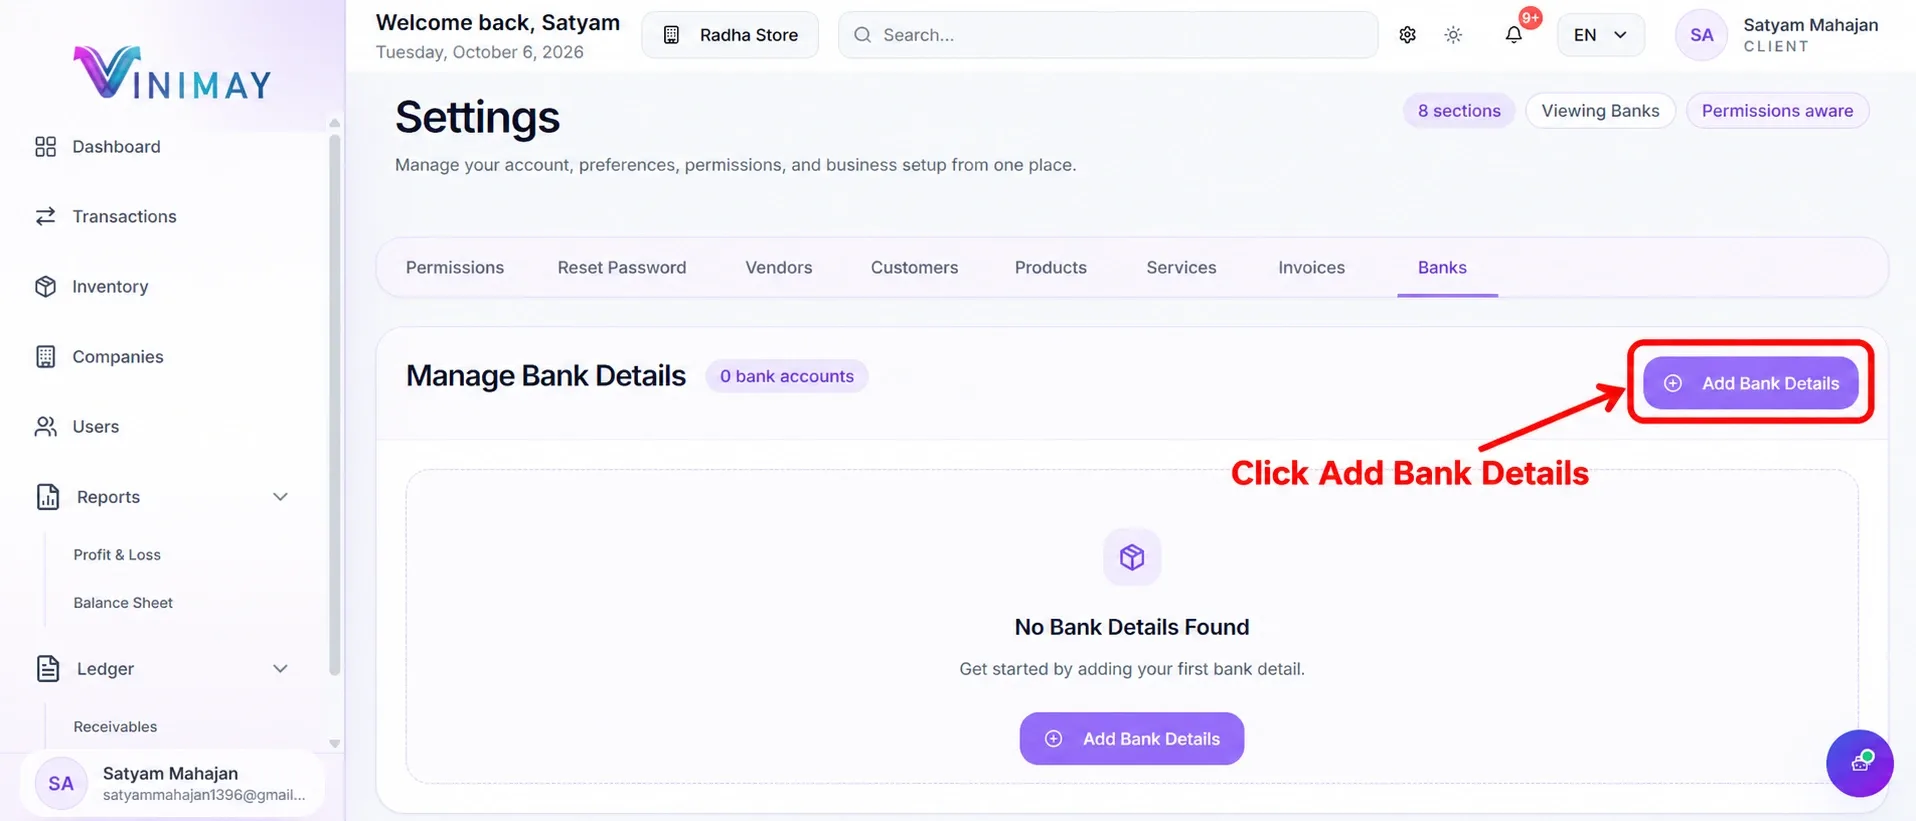
Step 3: Click Add Bank Details
In the Banks section, you will find the Manage Bank Details option.
If you have not added a bank account yet, the message No Bank Details Found will appear.
Click Add Bank Details to open the bank account form.
Step 4: Enter Your Bank Account Information
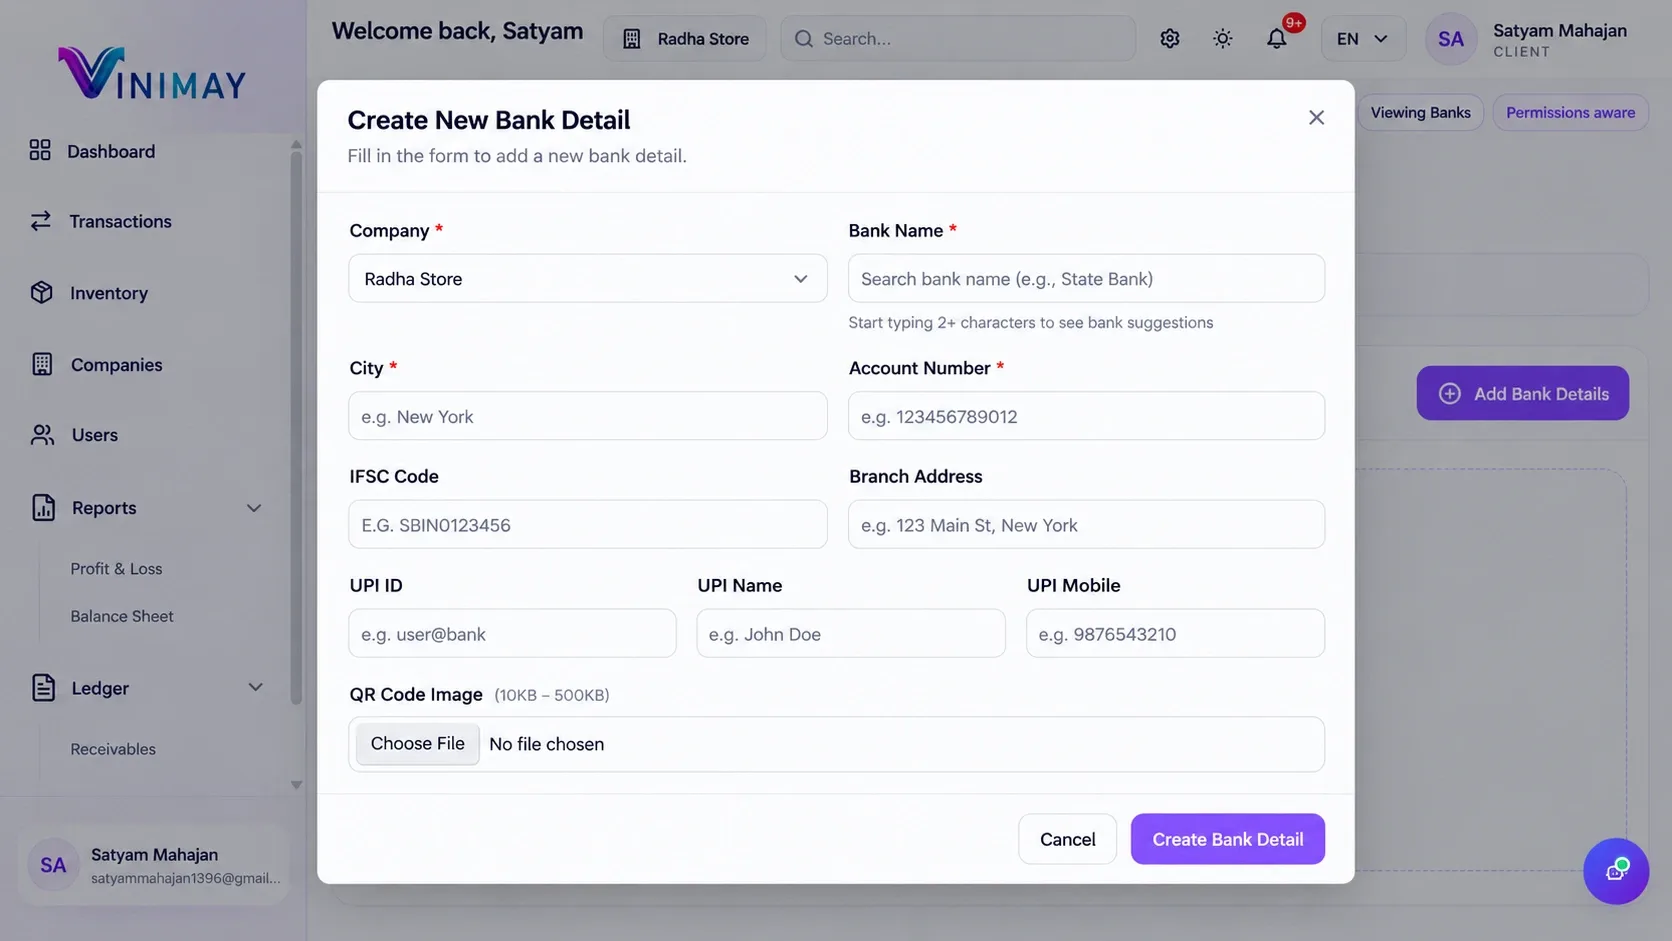
The Create New Bank Detail form will open.
Enter the following information:
| Field | Details |
|---|---|
| Company | Select the company for which you want to add bank details |
| Bank Name | Enter your bank name |
| City | Enter the bank's city |
| Account Number | Enter your bank account number |
| IFSC Code | Enter your bank branch IFSC code |
| Branch Address | Enter your bank branch address |
| UPI ID | Enter your business UPI ID, if applicable |
| UPI Name | Enter the name associated with your UPI account |
| UPI Mobile | Enter the mobile number associated with your UPI account |
| QR Code Image | Upload a payment QR code image, if required |
Fields marked with an asterisk (*) are mandatory.
Review your bank account information carefully before submitting the form.
Step 5: Save Your Bank Details
After entering the required information, review all the details carefully.
Click the Create Bank Detail button at the bottom of the form.
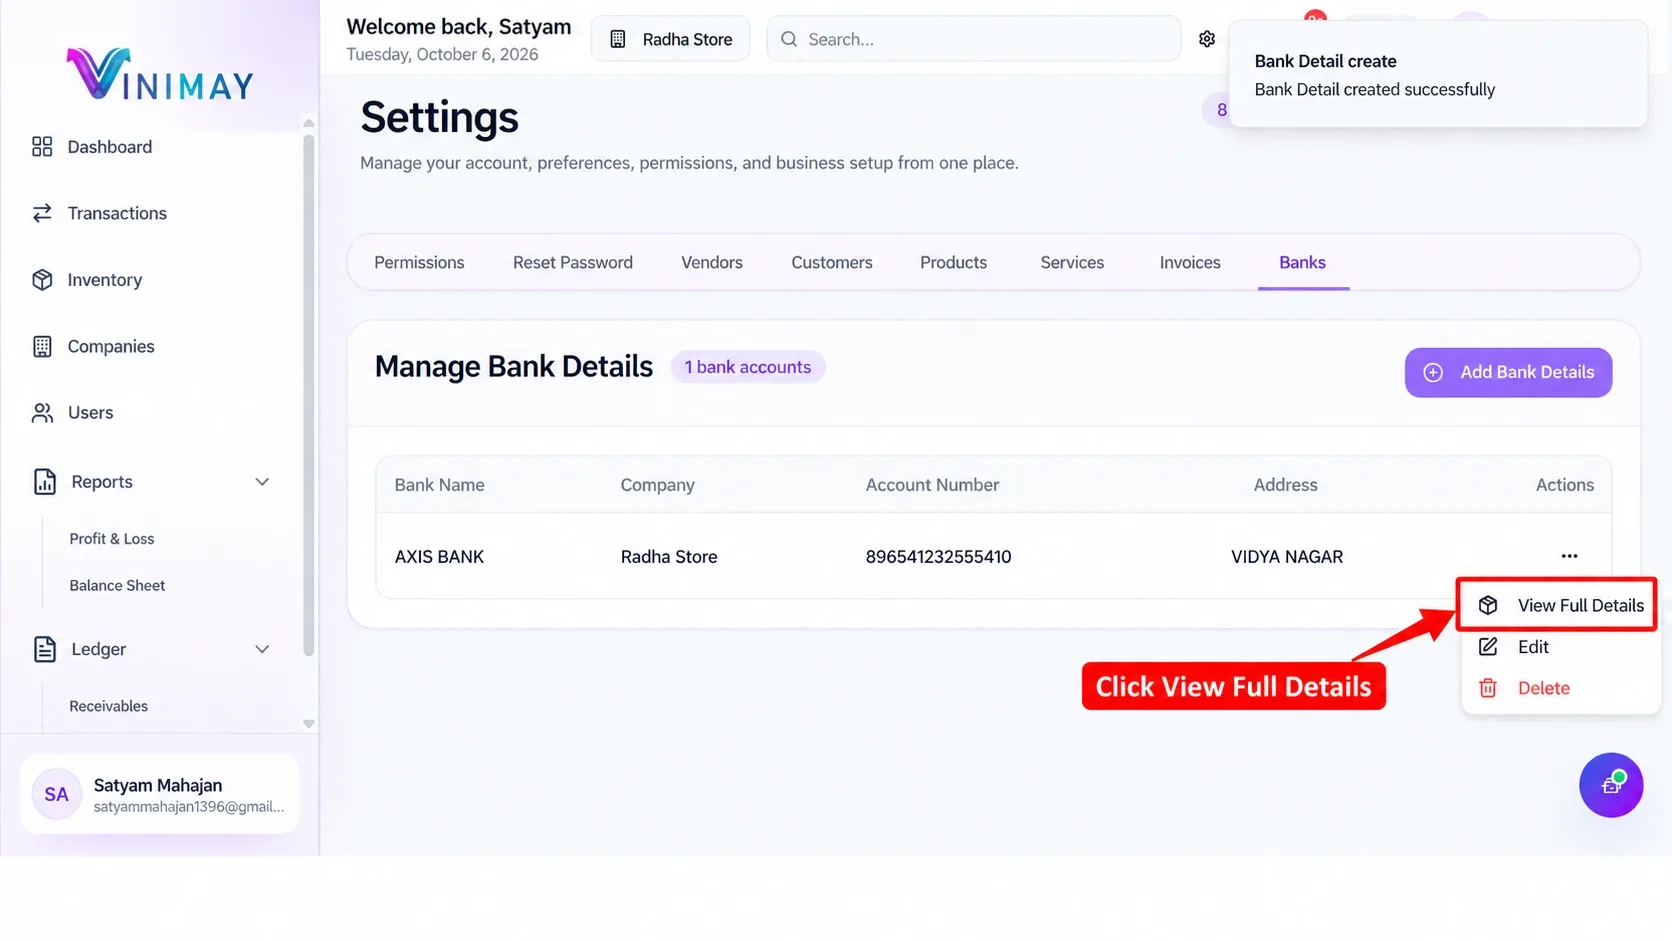
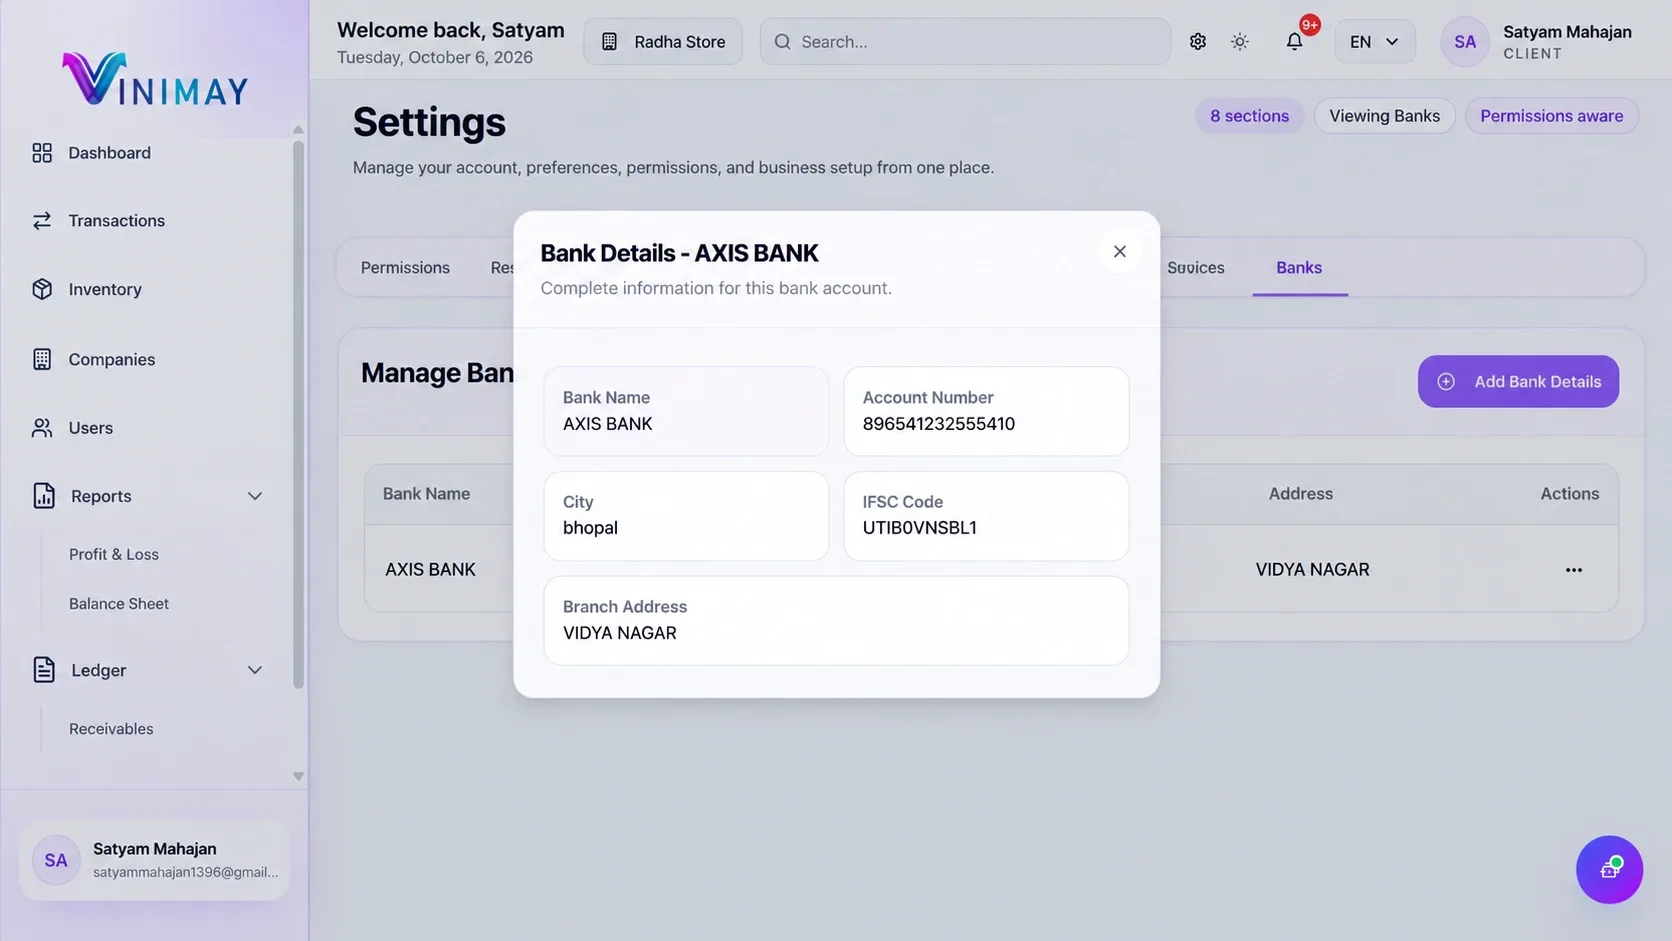
Once the information is saved successfully, return to the Banks section and confirm that your bank account has been added.
You have now completed the process to add bank details in Vinimay.
How to Check Bank Details on an Invoice in Vinimay
After adding your bank account information, the next step is to verify whether the correct bank details appear on your sales invoices.
Follow these steps to check your bank information in an invoice preview.
Step 6: Open the Transactions Section
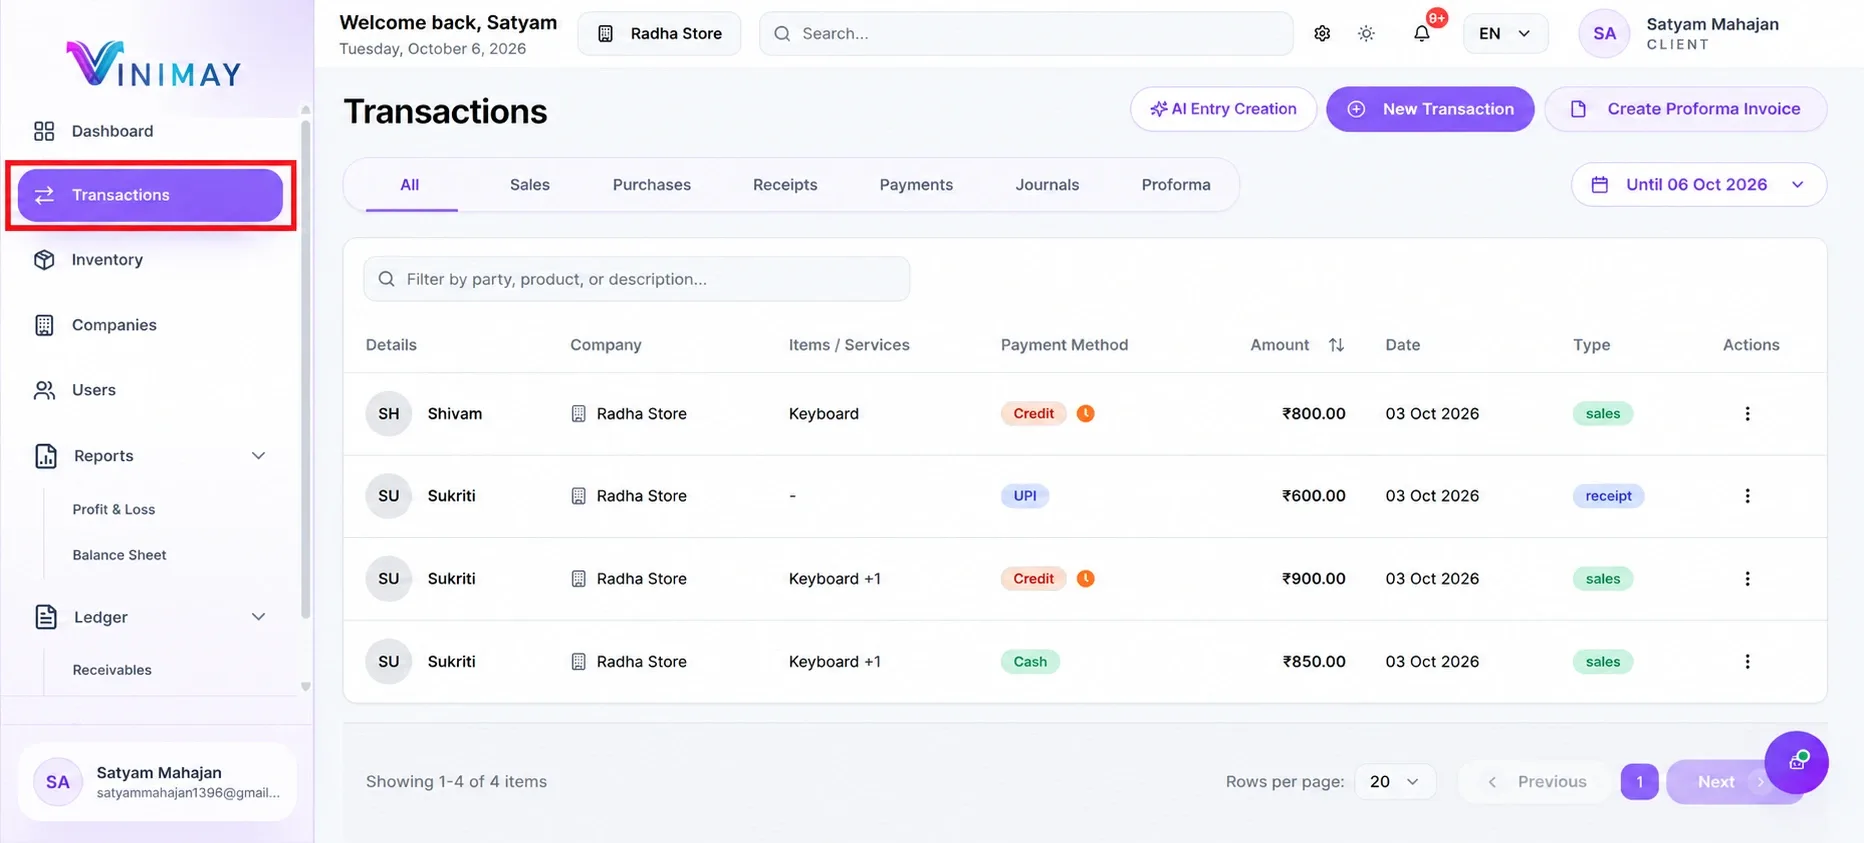
From the left navigation menu, click Transactions.
The Transactions page displays your business records, including sales, purchases, receipts, payments, and journals.
Select the Sales tab if you want to filter the list to sales invoices.
Locate the invoice you want to check.
Step 7: Click the Three-Dot Actions Menu
On the Transactions page, locate the sales invoice you want to check. Move to the Actions column on the right side of the invoice row and click the three-dot (⋮) icon to open the available invoice options.
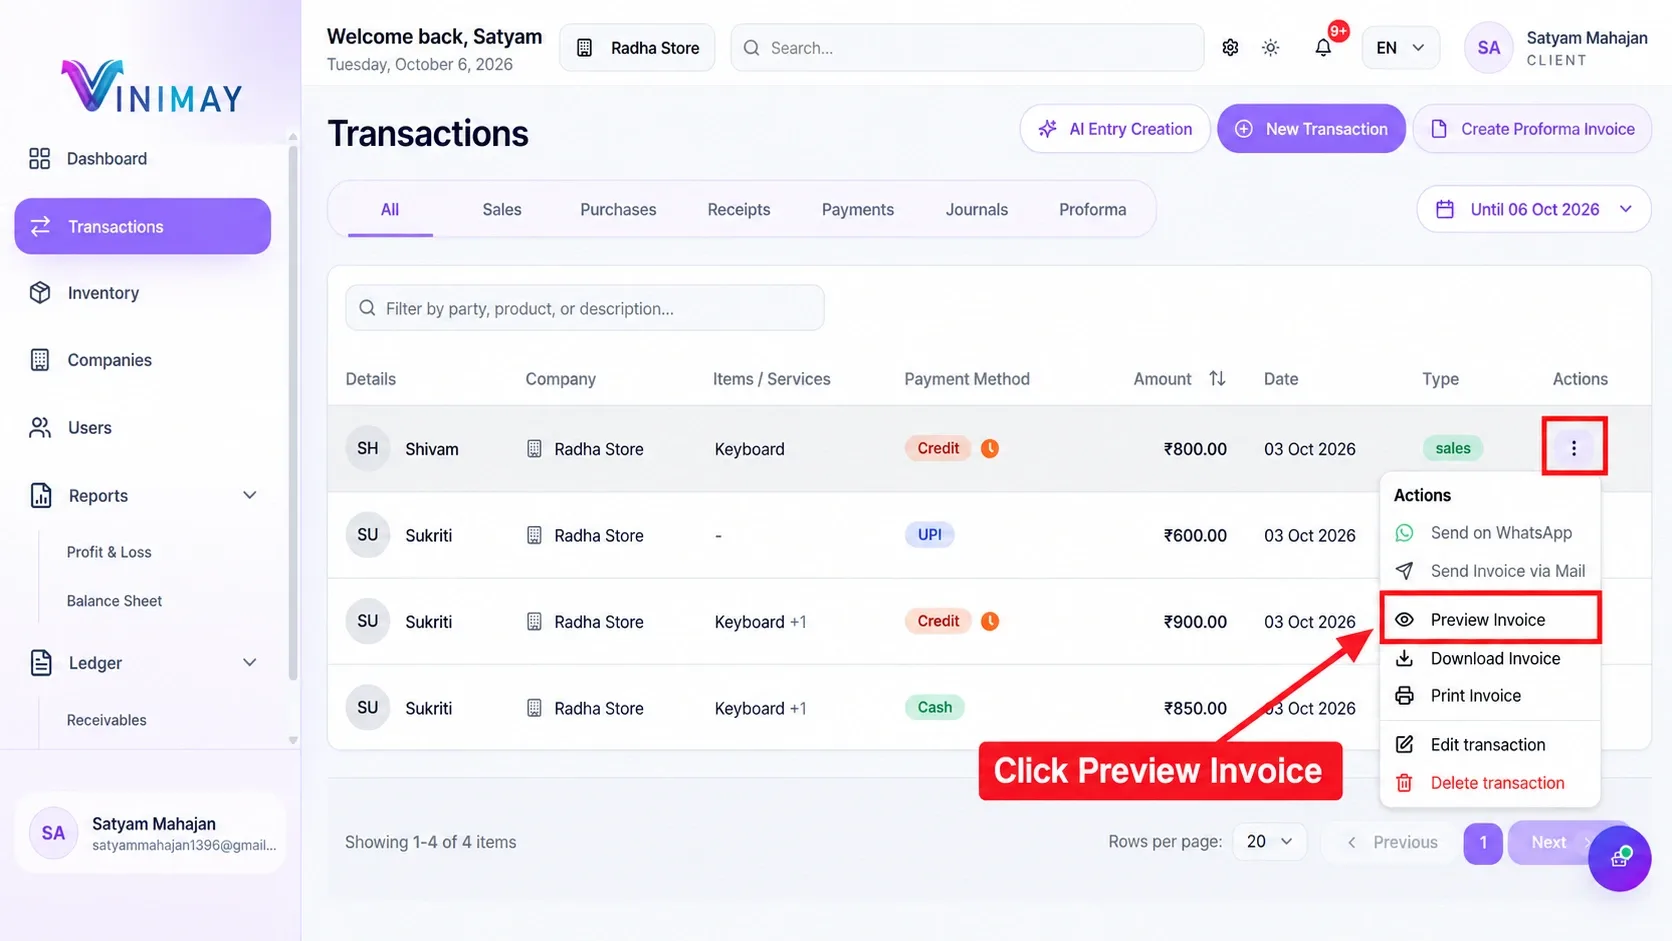
Step 7: Select Preview Invoice
Find the required sales invoice.
On the right side of its row, click the three-dot Actions menu.
A list of available options will appear, including:
Preview Invoice
Download Invoice
Print Invoice
Edit Transaction
Delete Transaction
Click Preview Invoice.
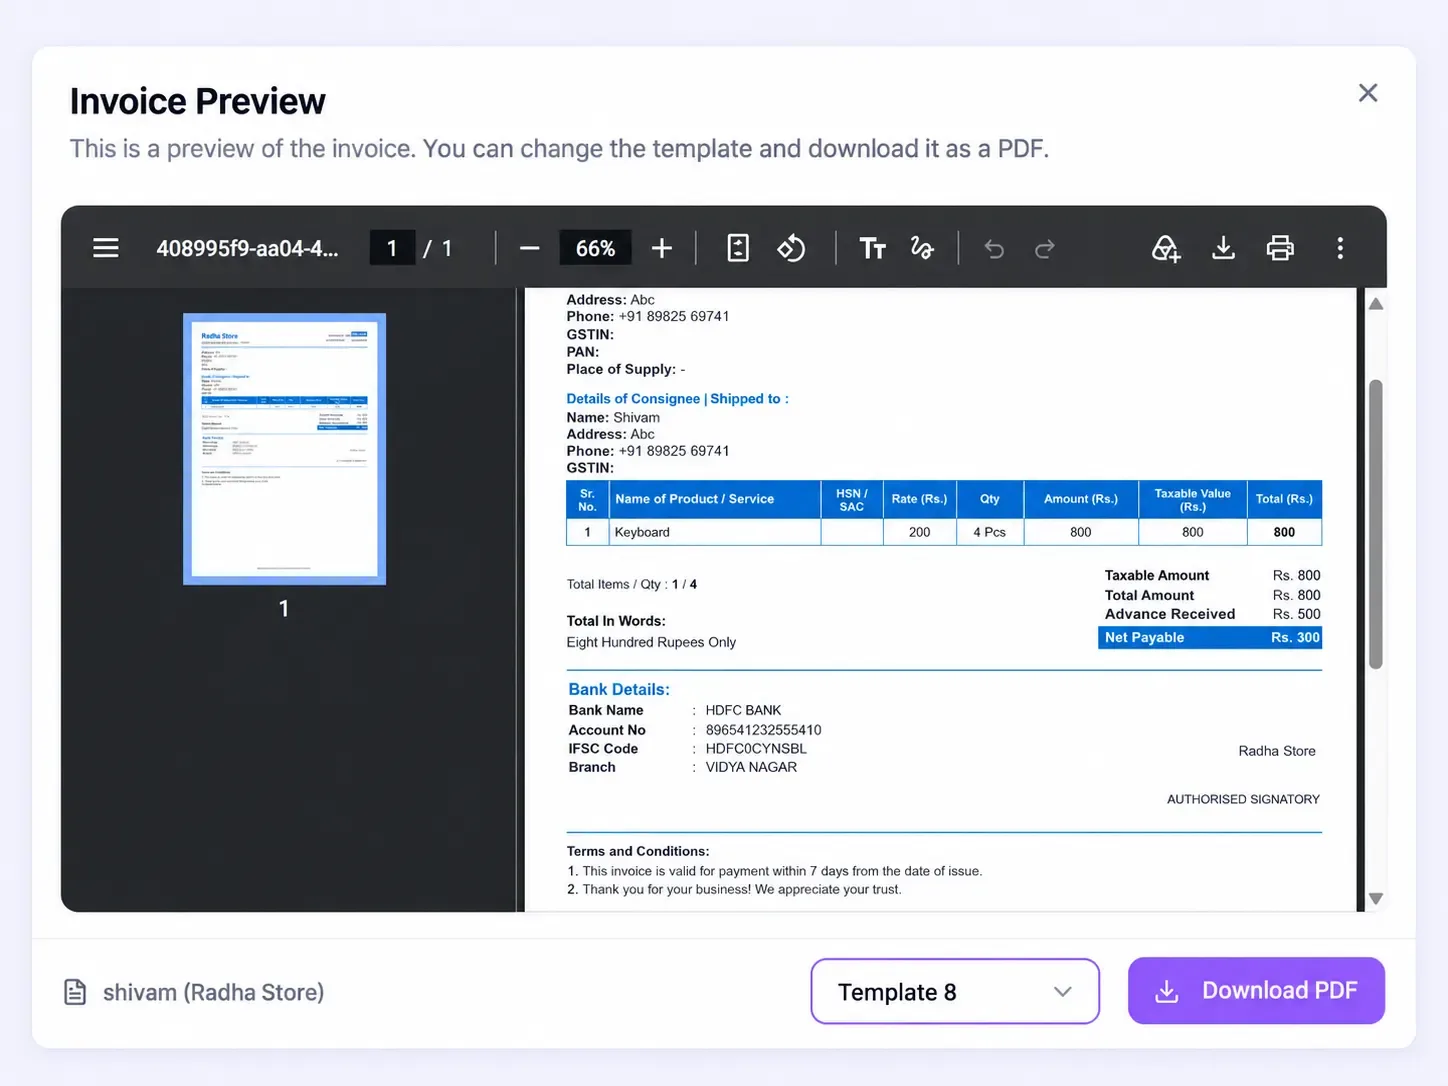
Published by admin
Our editorial and compliance specialists create practical guides, tax calculation rules, and operational strategies to empower Indian small business owners and accountants.