Vinimay allows restaurants and cafes to add menu items so they can be used for billing, table orders, inventory tracking, and restaurant operations.
Step 1: Open the Restaurant & Cafe Section
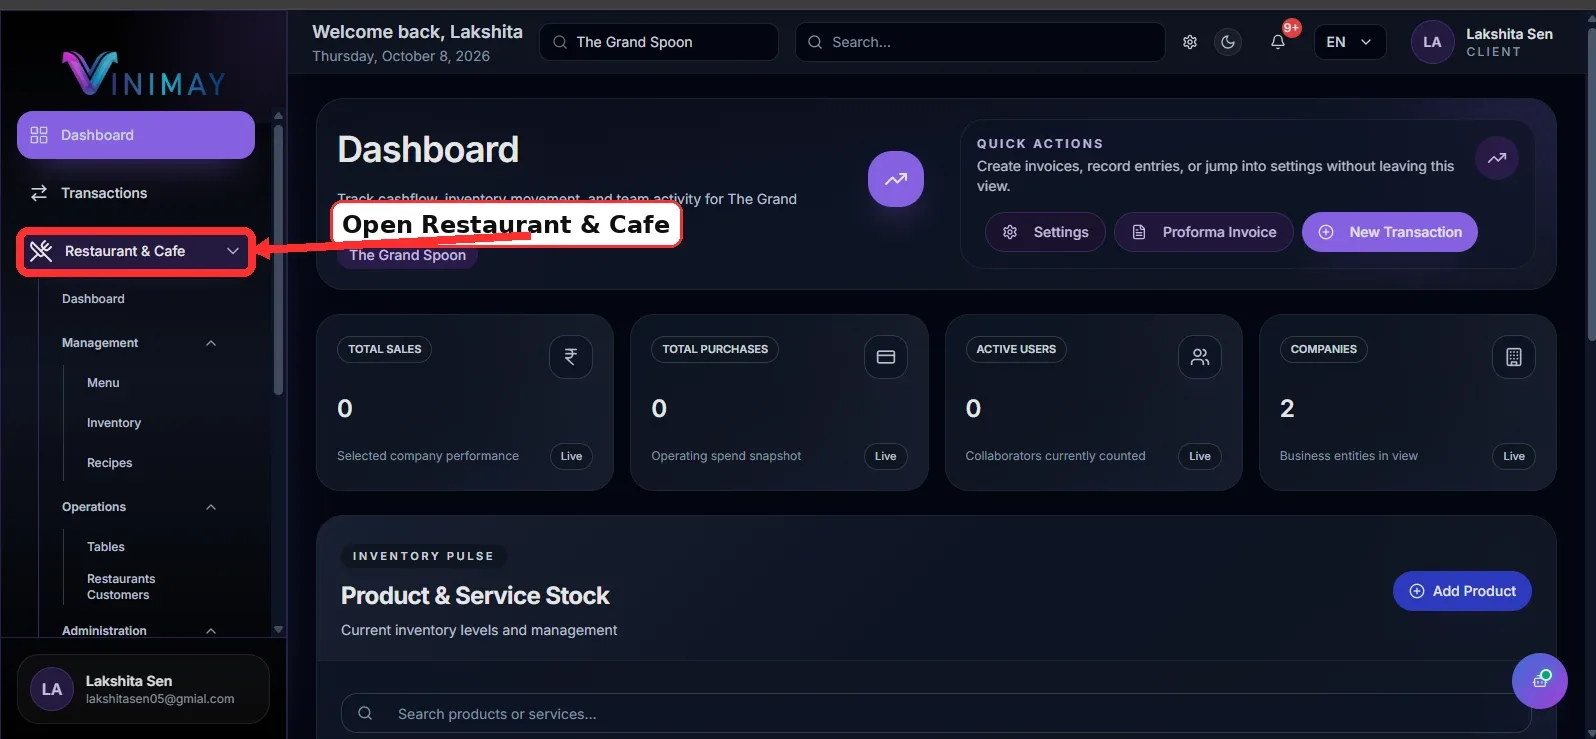
Once you have selected your restaurant, look at the navigation menu on the left side of the dashboard.
Click on Restaurant & Cafe to access the restaurant-specific features available for your selected company.
This section may provide access to menu management, restaurant orders, table operations, and other features, depending on your Vinimay configuration.
Make sure you are working within the correct restaurant before moving to the next step.
Step 2: Open Menu or Product Management
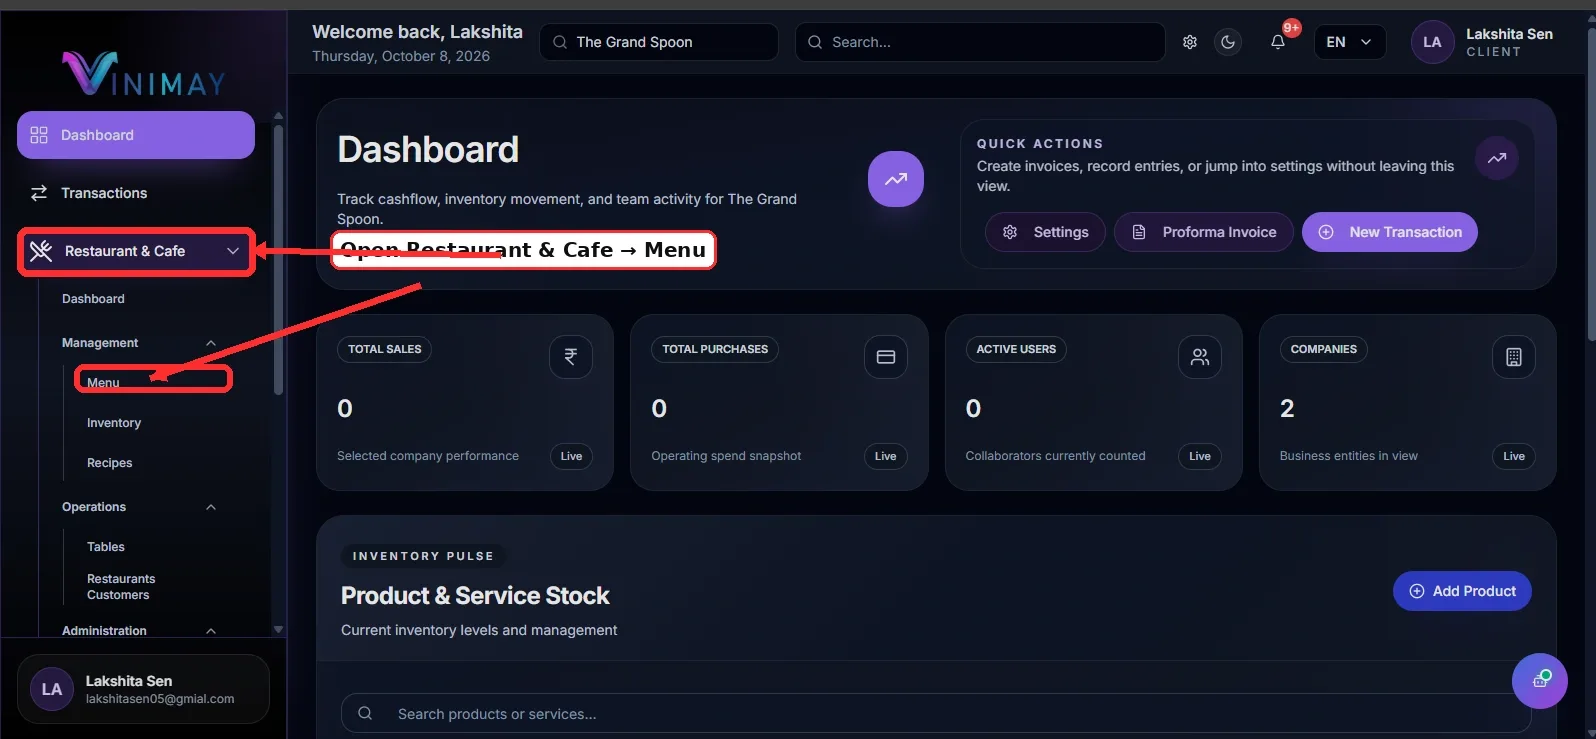
Next, look for the section used to manage your restaurant's menu items or products.
Depending on your Vinimay setup, this option may be available under Restaurant & Cafe → Menu Items or through the Inventory / Products section.
Open the relevant section to view the existing items registered in your restaurant account. You can check whether the menu item you want to add already exists.
If the item is not listed, proceed to create a new one. This helps prevent duplicate entries and keeps your restaurant menu organised.
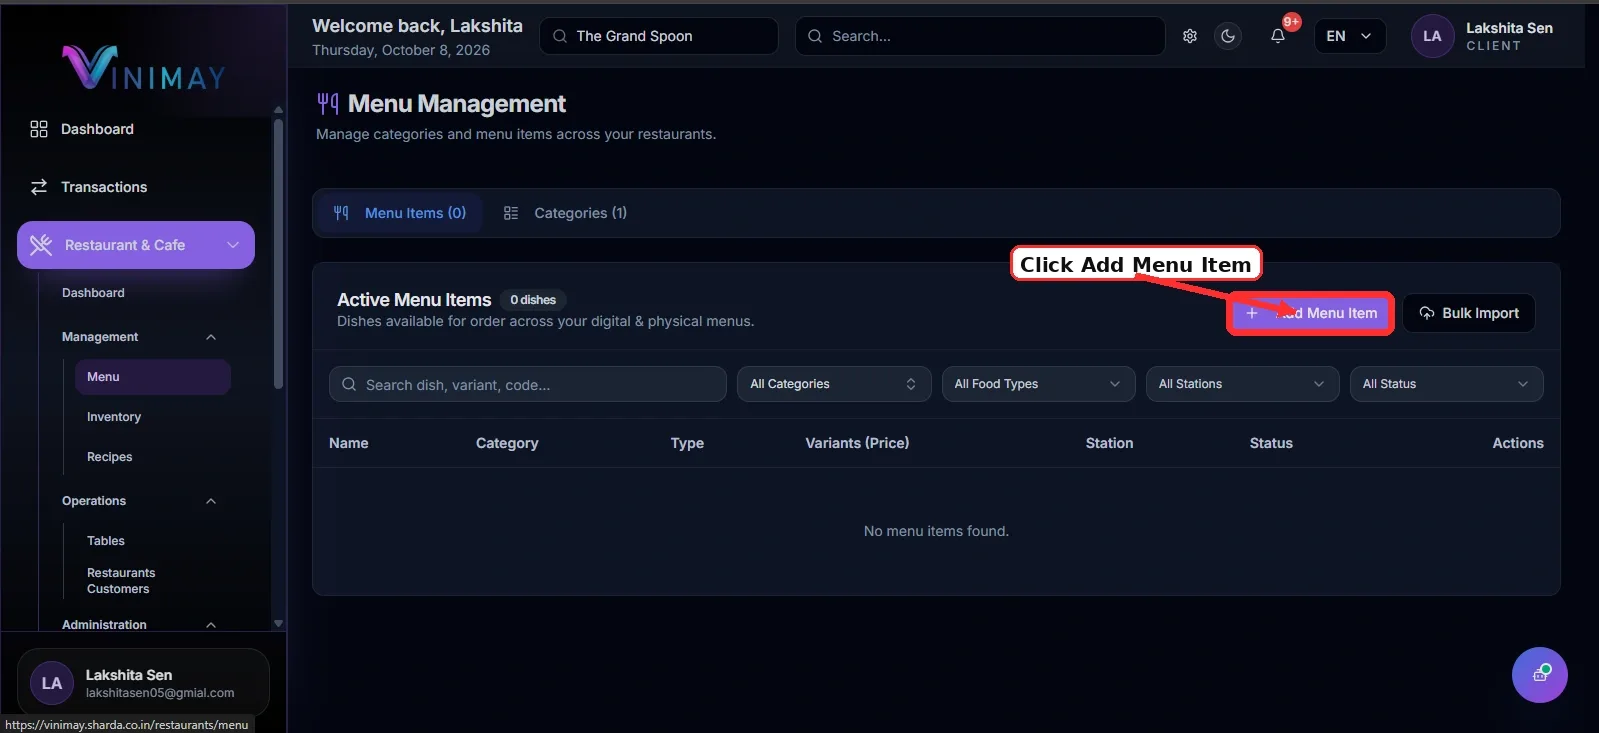
Step 3: Click Add Item or Add Product
After opening the menu or product management section, look for the Add Item, Add Product, or similar button.
Click the available option to open the form for creating a new menu item.
This form allows you to enter important information about the food or beverage you want to sell. Depending on the available fields, you may be able to configure the item's category, price, tax rate, description, and stock details.
Keep the necessary item information ready so you can complete the form accurately.
Step 4: Enter Menu Item Details
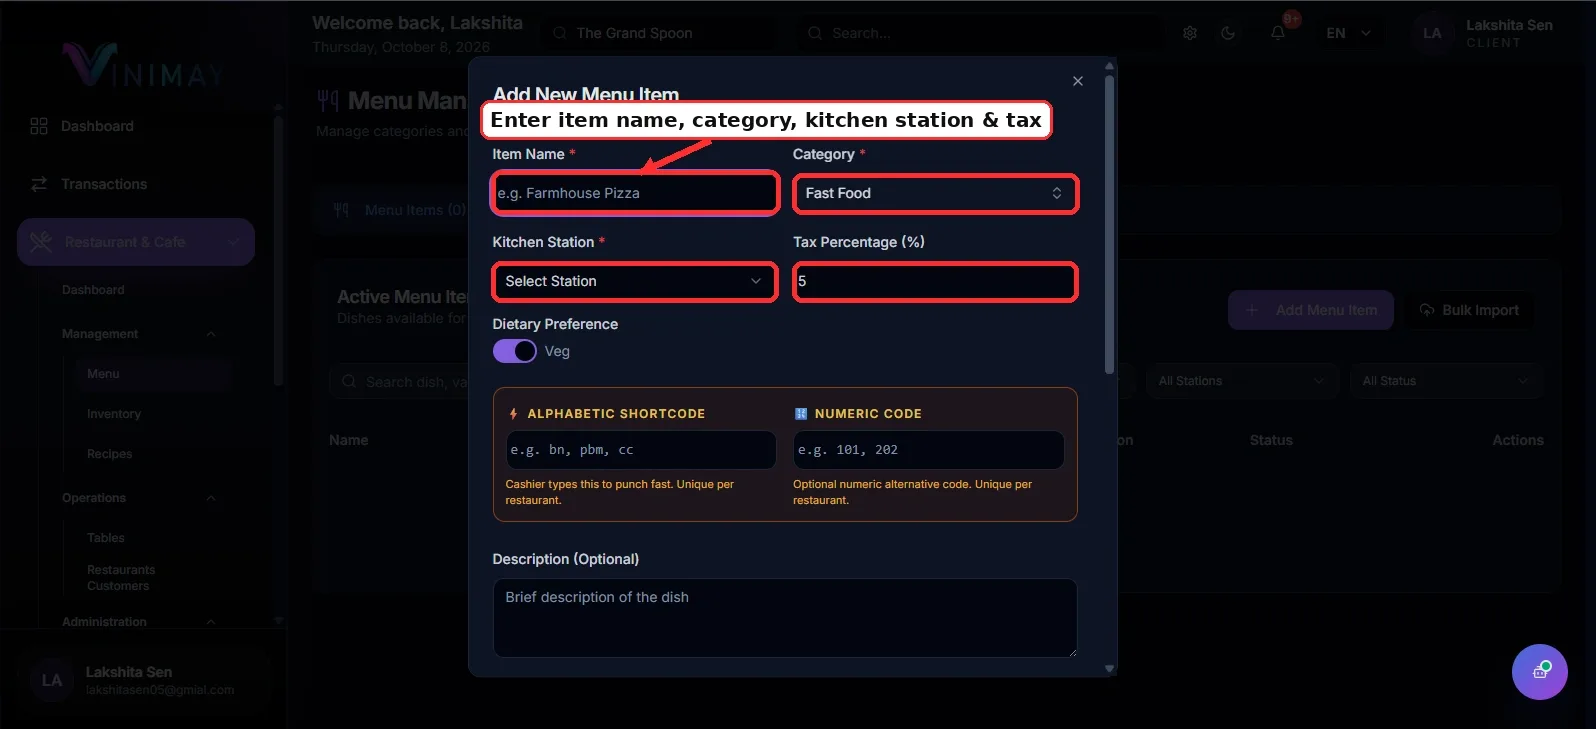
Fill in the required fields in the Add New Menu Item form. Enter the information carefully to ensure the item appears correctly during billing and order creation.
Common details may include:
Item Name: Enter the name of the food or beverage.
Category: Select the appropriate category, such as fast food, beverages, or desserts.
Selling Price: Enter the amount customers will pay.
GST Rate: Select the applicable tax rate based on the item and relevant GST rules.
Unit: Choose the appropriate unit, if required.
Description: Add a short description of the item.
Stock Details: Enter inventory information if the item is stock-managed.
For example, you could enter Veg Burger as the item name, Fast Food as the category, and ₹120 as the selling price. Select the applicable GST rate according to the restaurant's tax requirements.
Review all entries before continuing.
Step 5: Add Image, Pricing, and Customisations
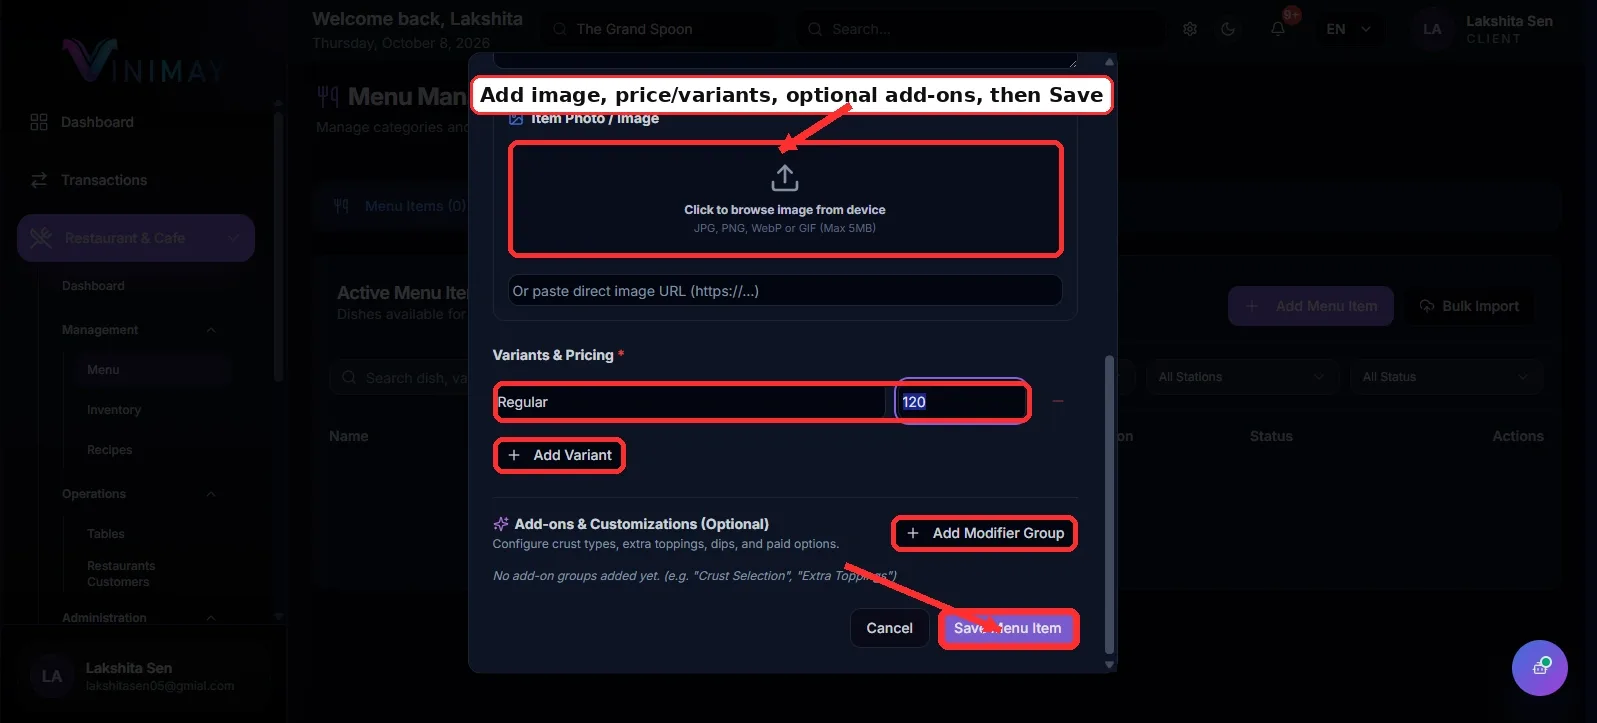
If the form supports images, upload a clear picture of the menu item. A suitable image can help staff identify the product and may improve its presentation in supported ordering interfaces.
Next, locate the Variants & Pricing section. Enter a variant name and its corresponding selling price. For example, you could add a regular variant priced at ₹120.
If your restaurant offers different sizes or portions, use Add Variant to create additional options with their respective prices.
You may also configure optional customisations, if supported, such as extra cheese, toppings, sauces, or dips. Check the available fields to see whether additional charges can be assigned to these options.
Once everything is entered correctly, proceed to save the item.
Step 6: Save the Menu Item
Before submitting the form, review the item name, category, selling price, GST rate, variants, and other details.
Click Save Menu Item, Save, Add Product, or the available confirmation button to complete the process.
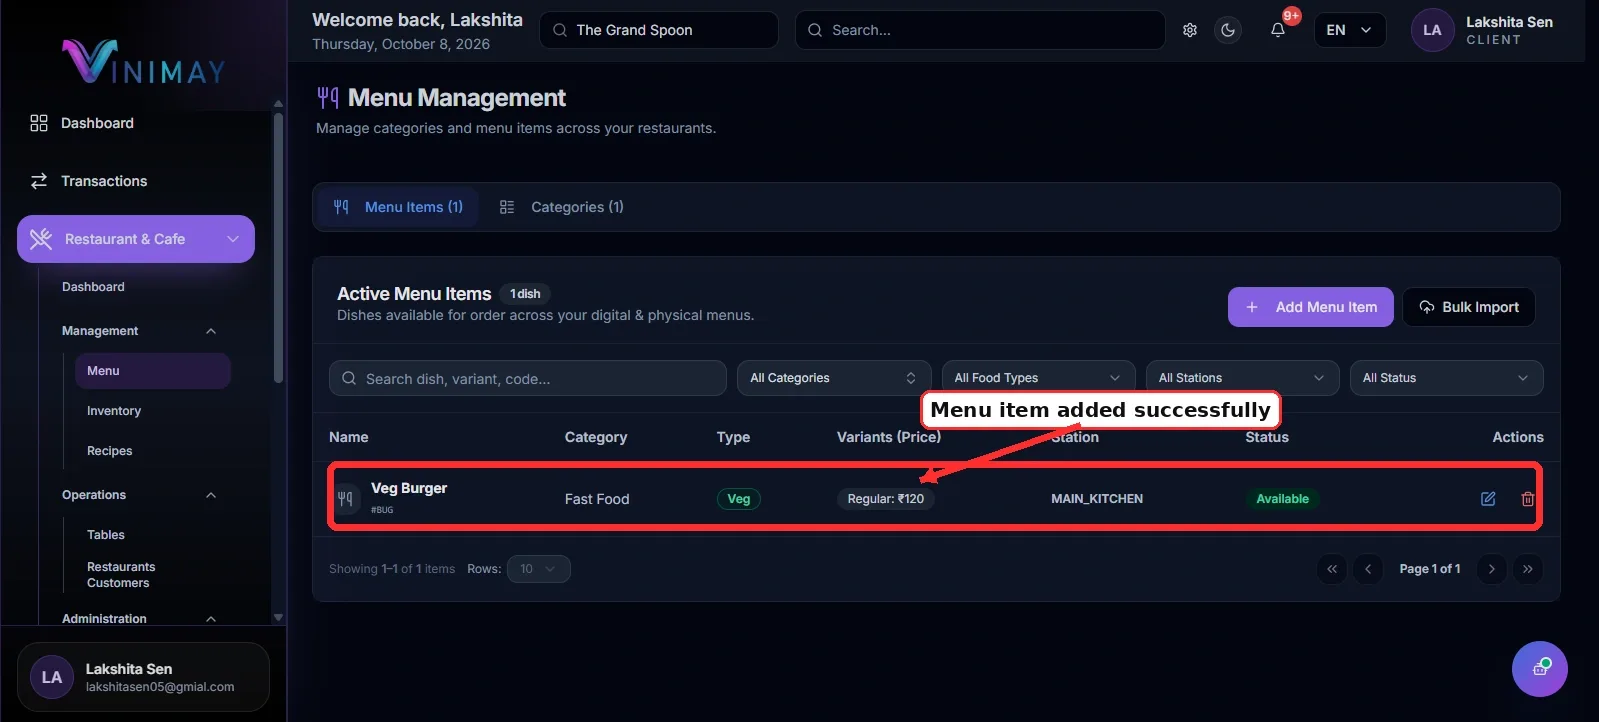
After saving, return to the menu or product list and check whether the new item appears correctly. If it is missing, review any error messages and confirm that all required fields have been completed.
Quick Path
Login → Select Restaurant → Restaurant & Cafe / Inventory → Menu Items or Products → Add Item → Enter Details → Configure Variants → Save
Once the menu item has been added successfully, you can use it for restaurant orders and billing wherever the relevant Vinimay features are enabled.
Related Topics
Published by Team Vinimay
Our editorial and compliance specialists create practical guides, tax calculation rules, and operational strategies to empower Indian small business owners and accountants.