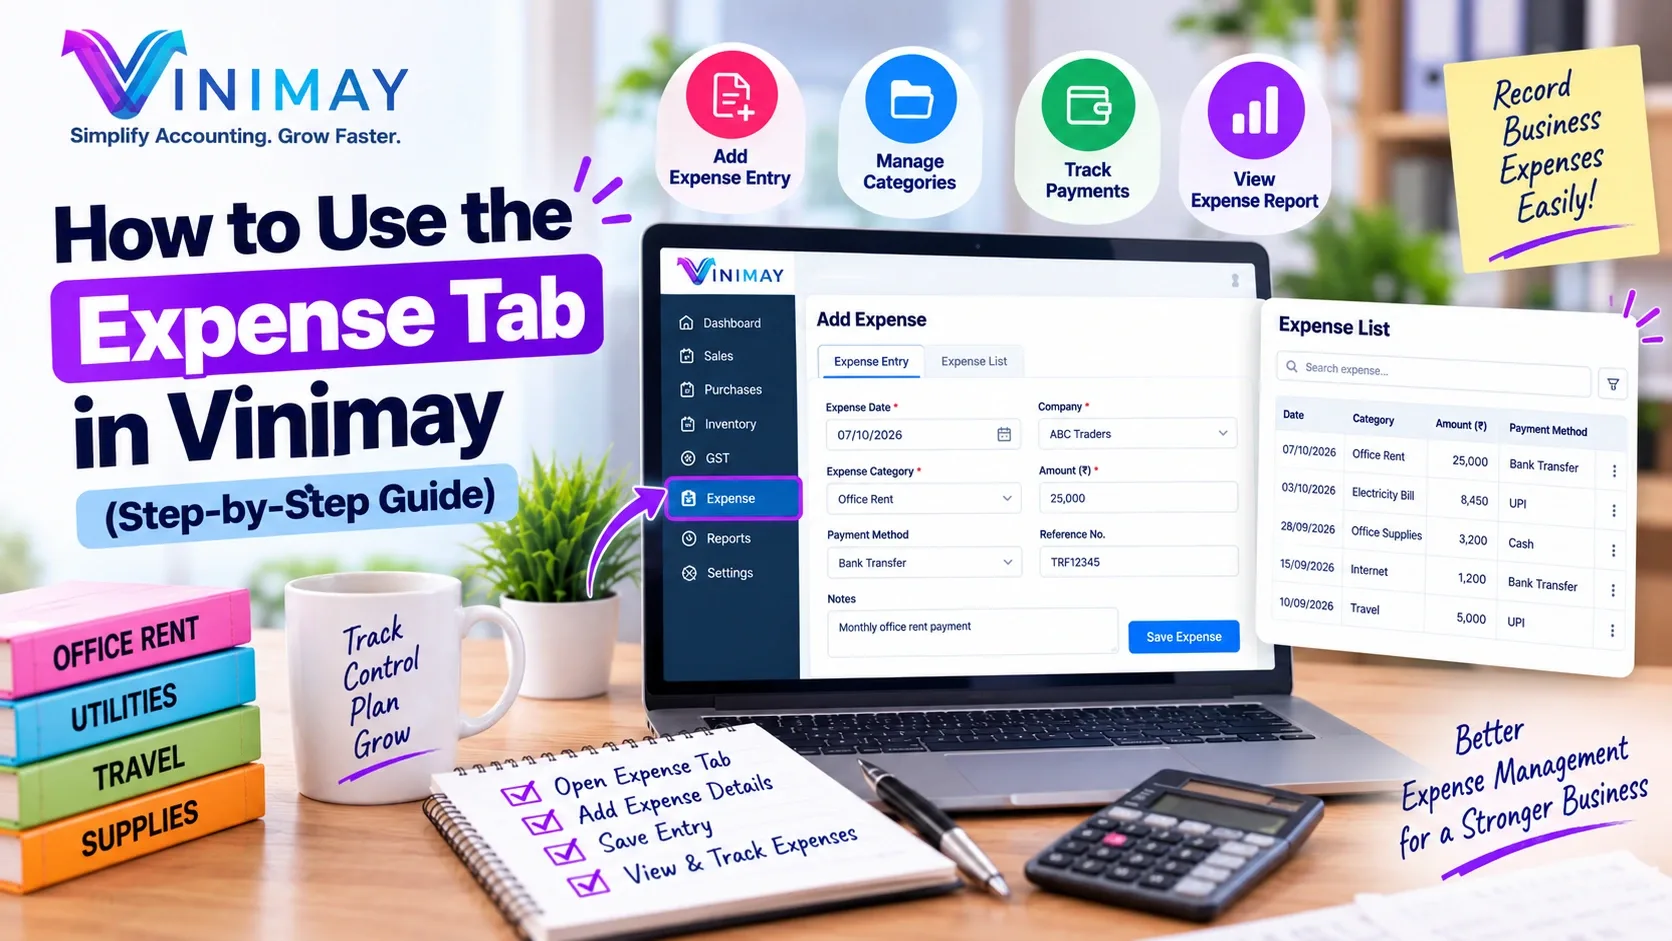
Vinimay allows you to control what each staff member can access. Instead of giving every user full access, you can assign a suitable role, company, and permissions based on their work responsibilities.
This helps keep your business data secure and makes sure each staff member only sees the features they need.
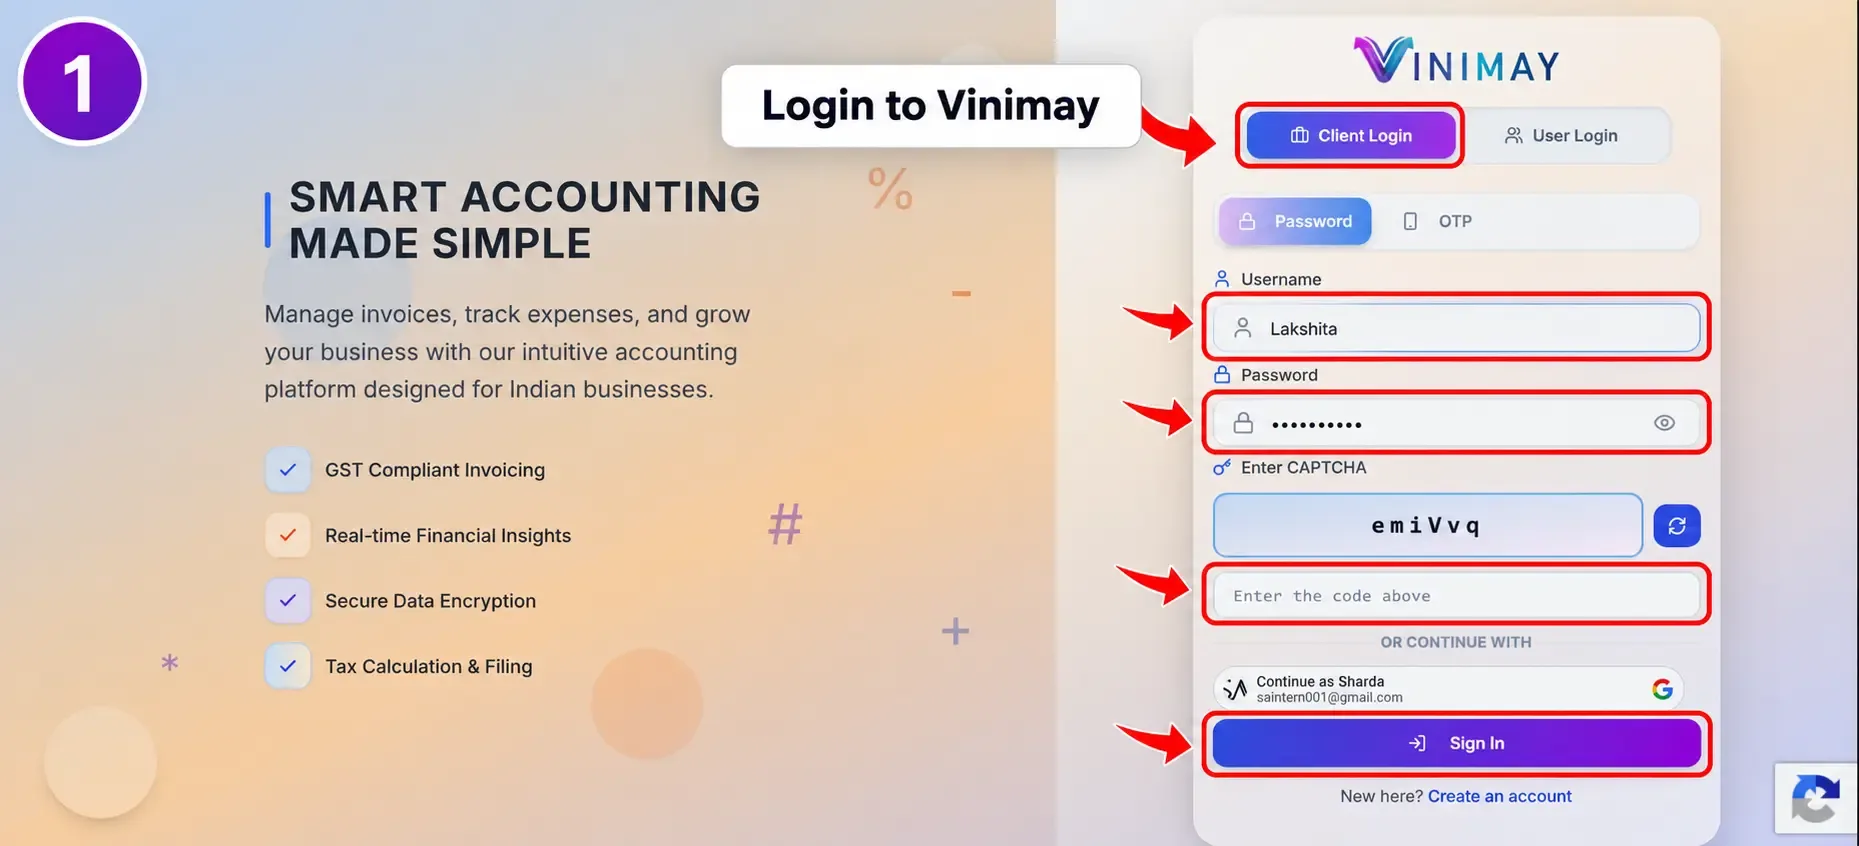
Step 1: Log in to Vinimay.
Open Vinimay and sign in using your client login or an account that has permission to manage users.
After login, you will reach the main dashboard.
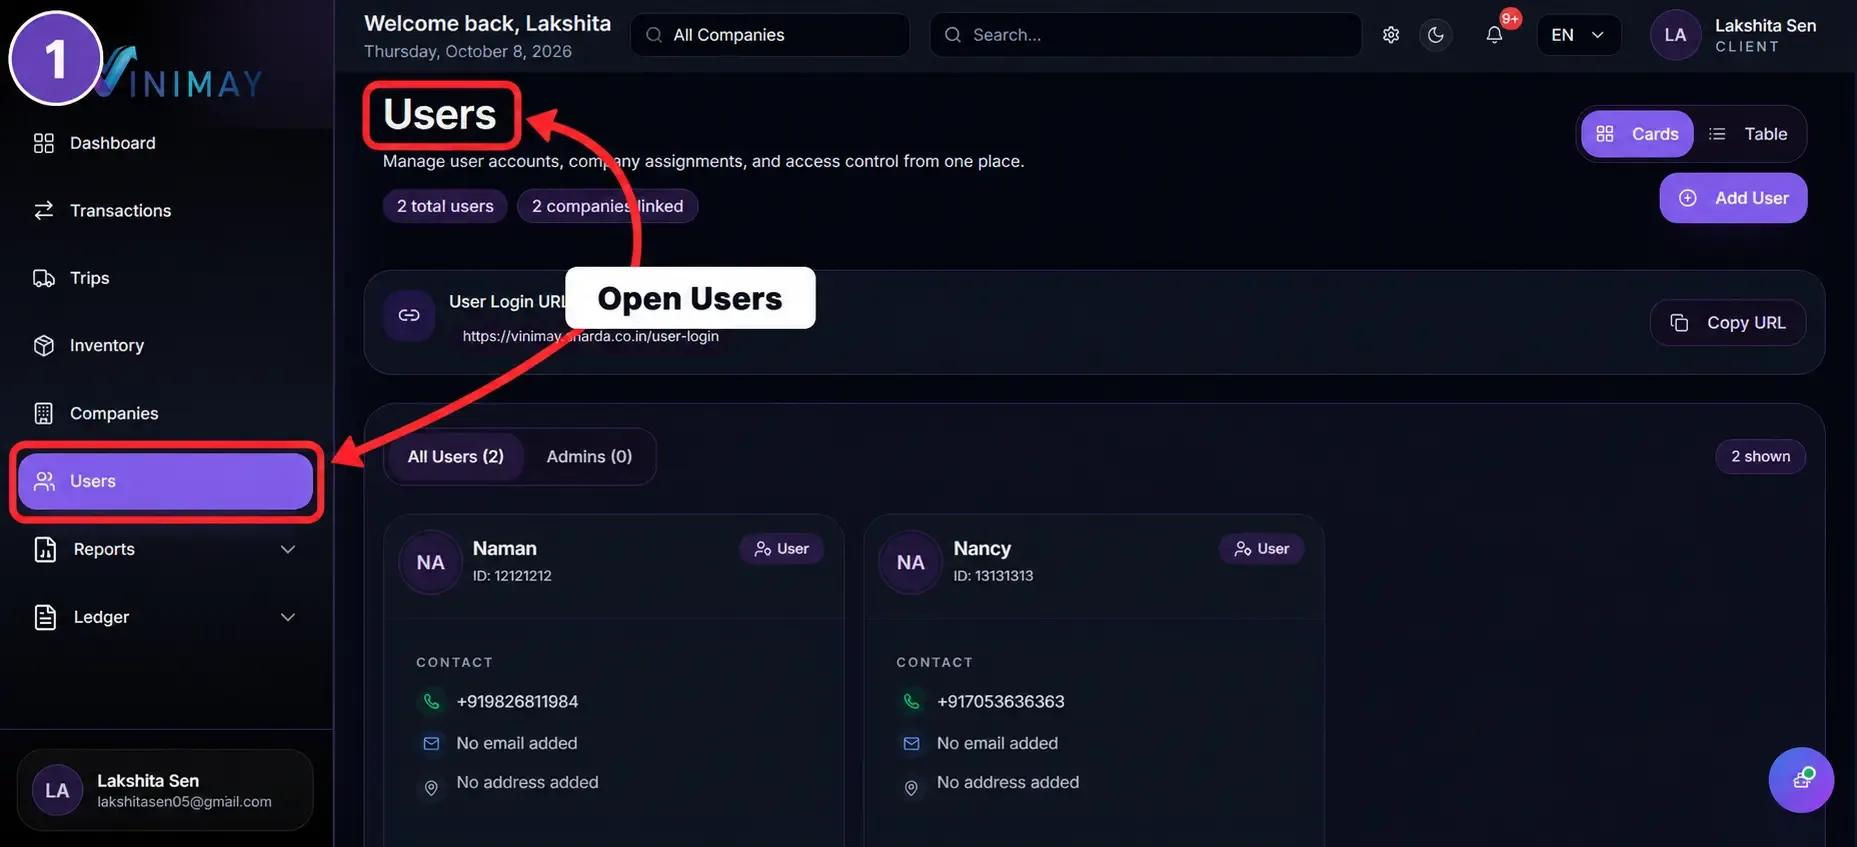
Step 2: Open the Users Section
From the left-side menu, click on Users.
The Users page shows all existing staff users linked to your account.
From here, you can add new users or manage existing ones.
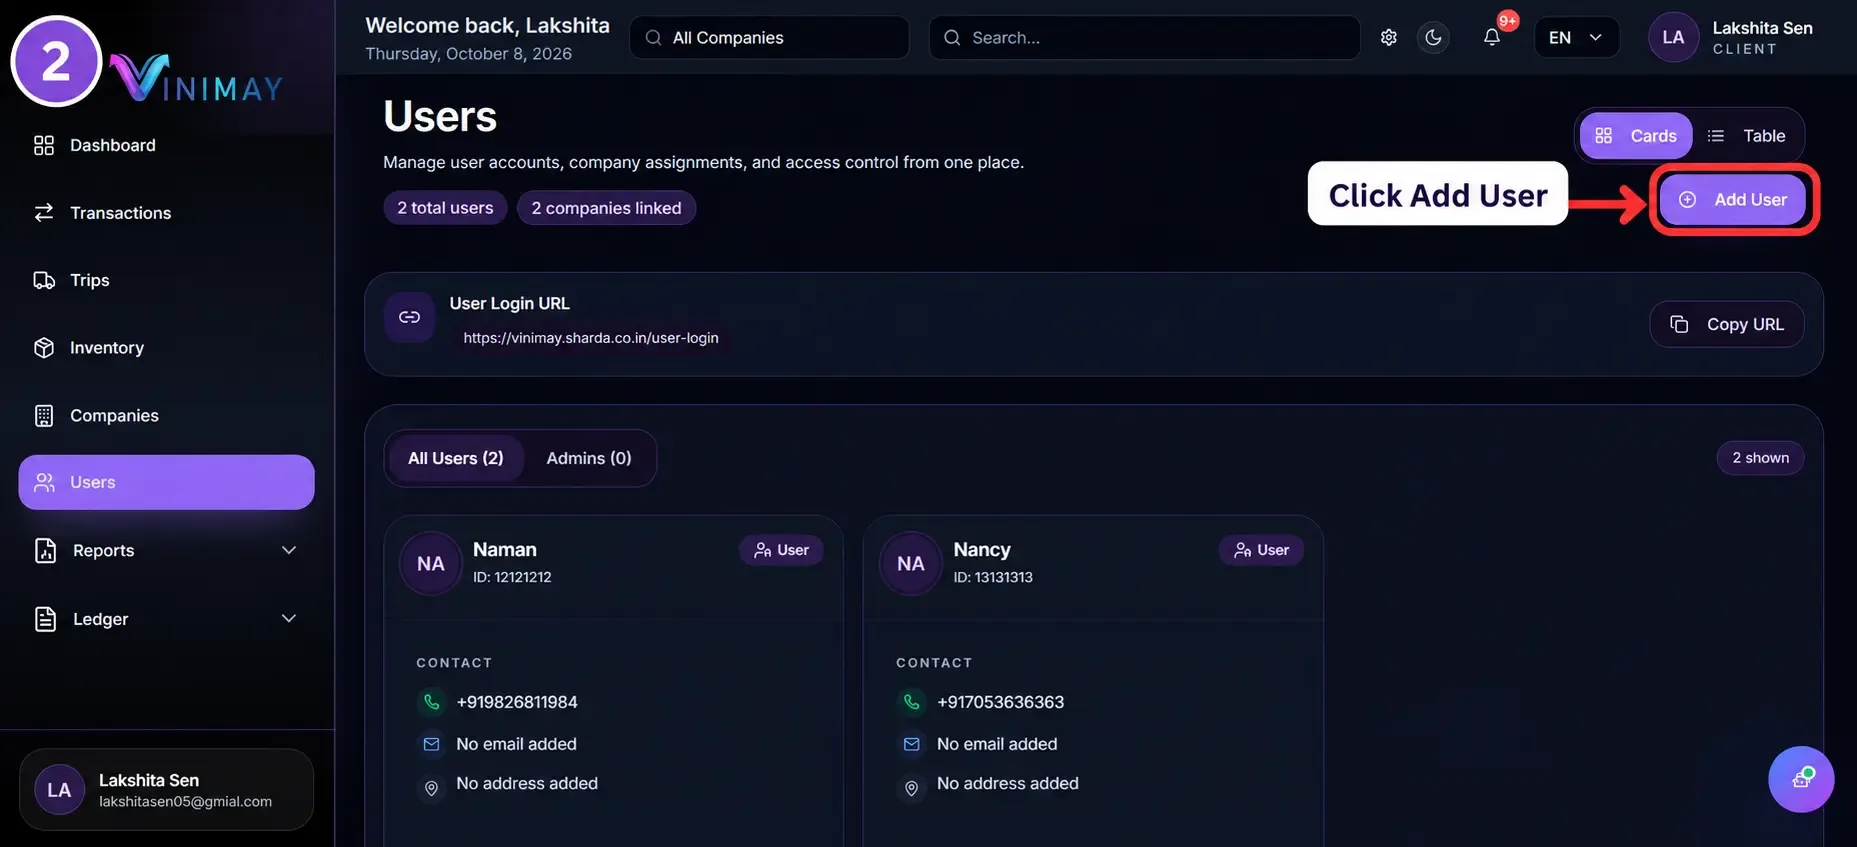
Step 3: Add or Select a User
Click Add User if you want to create a new staff account.
Enter the required details such as:
User Name
User ID
Password
Contact Number
Email
Address
If the staff member already exists, open their user details to review or update access.
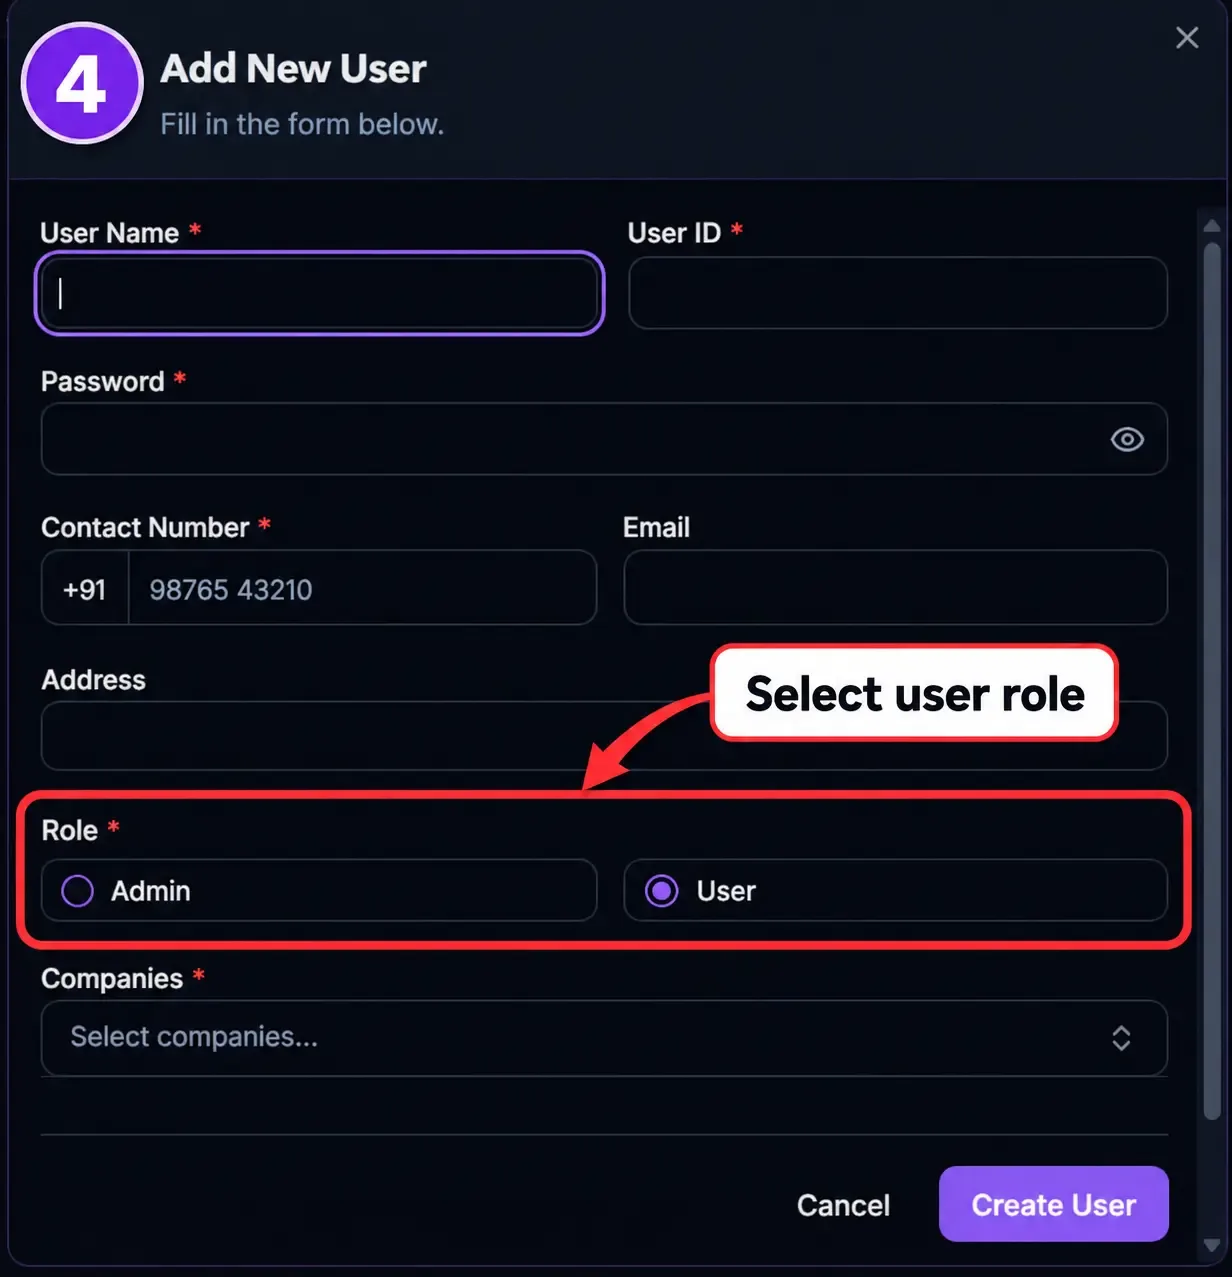
Step 4: Select the User Role
Choose the appropriate role for the staff member.
Depending on your Vinimay setup, roles may include options such as:
Admin – broader access and management rights
Manager – access to selected operational and business functions
User – limited access for regular day-to-day work
Choose the role according to the employee’s responsibilities.
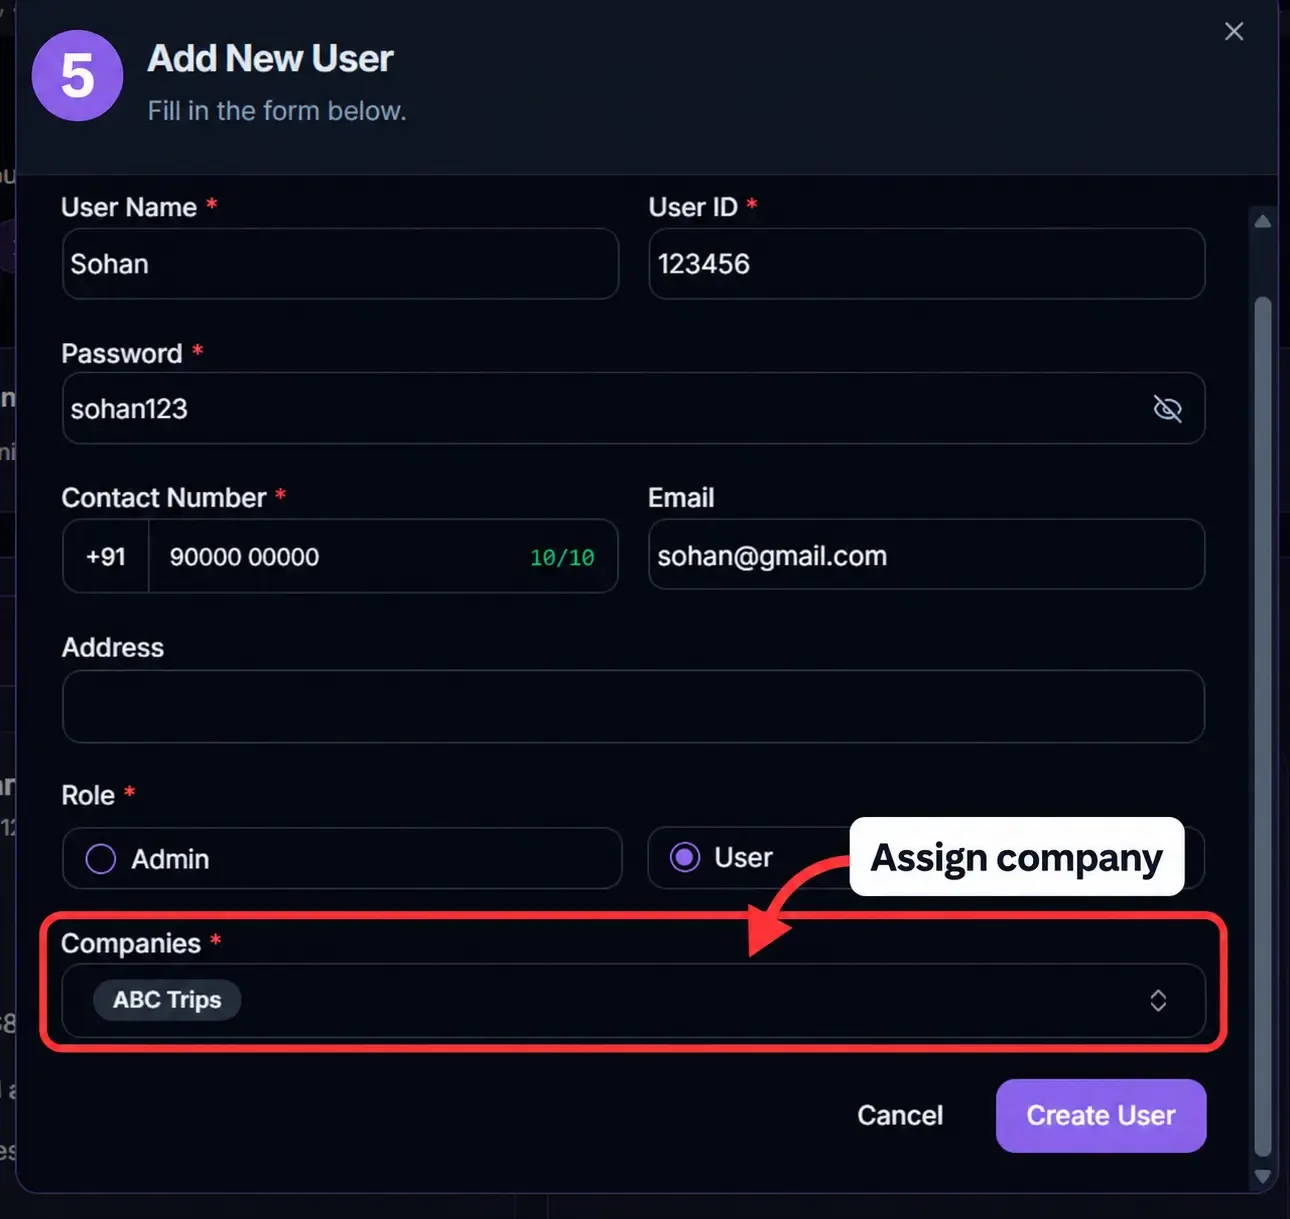
Step 5: Assign the Company
Select the company or companies the user should be allowed to access.
For example, if a staff member only works for ABC Trips, assign only that company.
This prevents the user from accessing data belonging to other companies in your account.
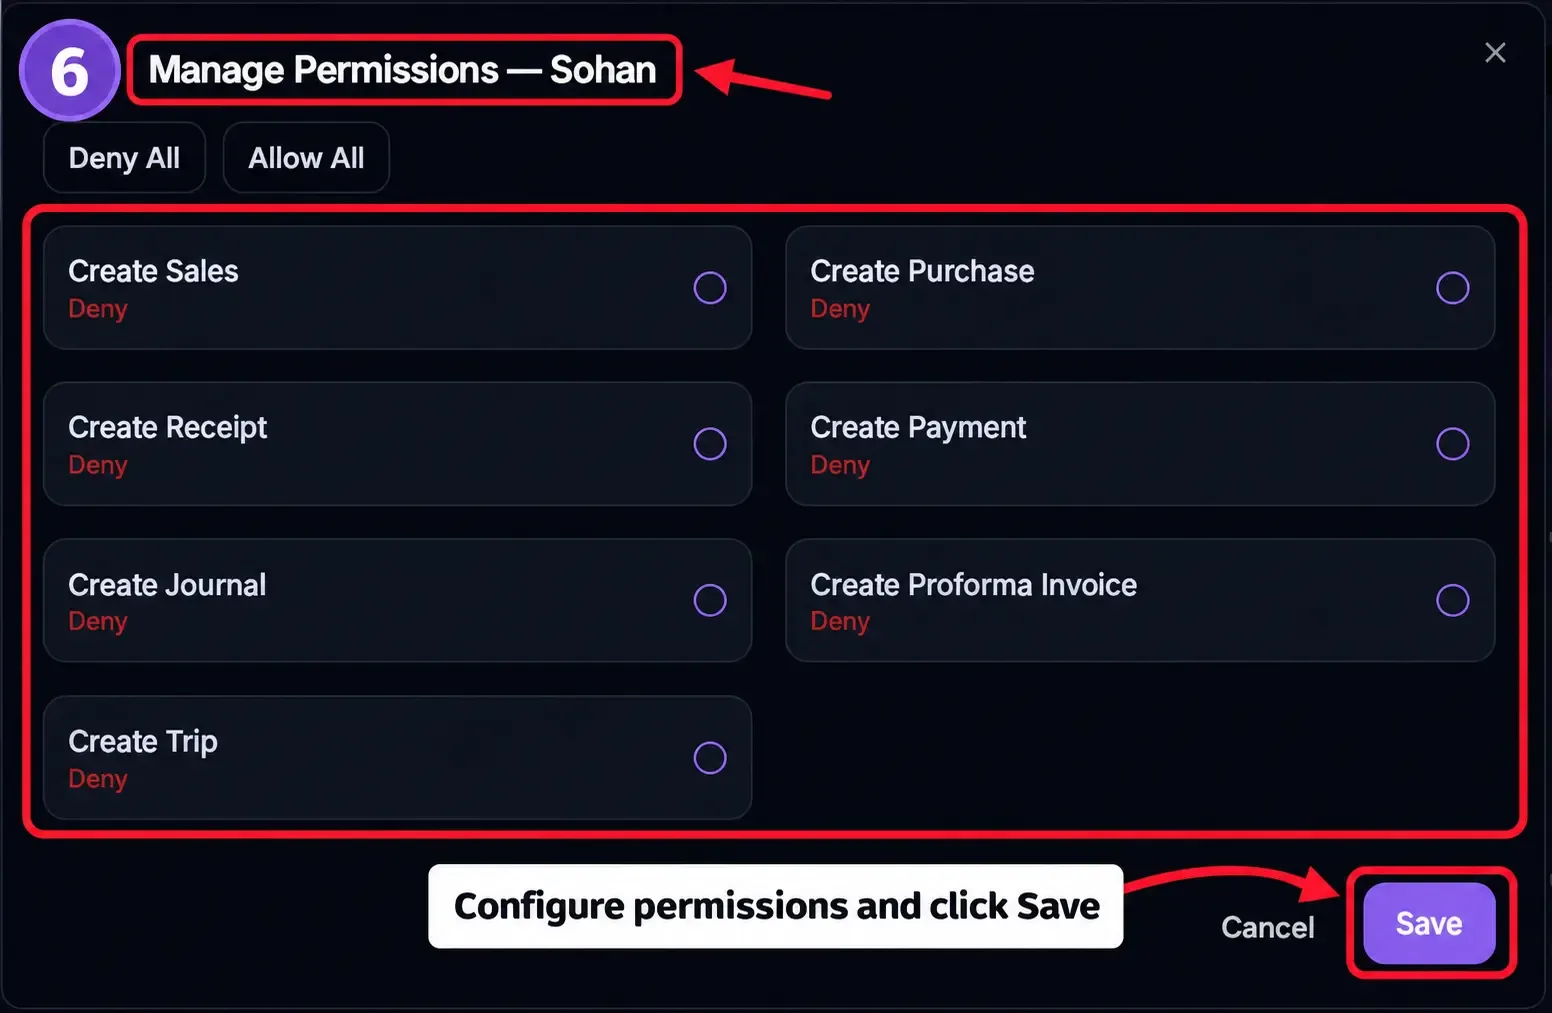
Step 6: Configure Permissions
After assigning the user, set the permissions available for that role or staff account.
Permissions may include access to areas such as:
Customers
Vendors
Products
Inventory
Transactions
Companies
Delivery Challans
User management
Other available features
Give only the permissions required for the staff member’s work.
For example, a billing employee may need access to Sales, Customers and Inventory but may not need permission to create users or manage companies.
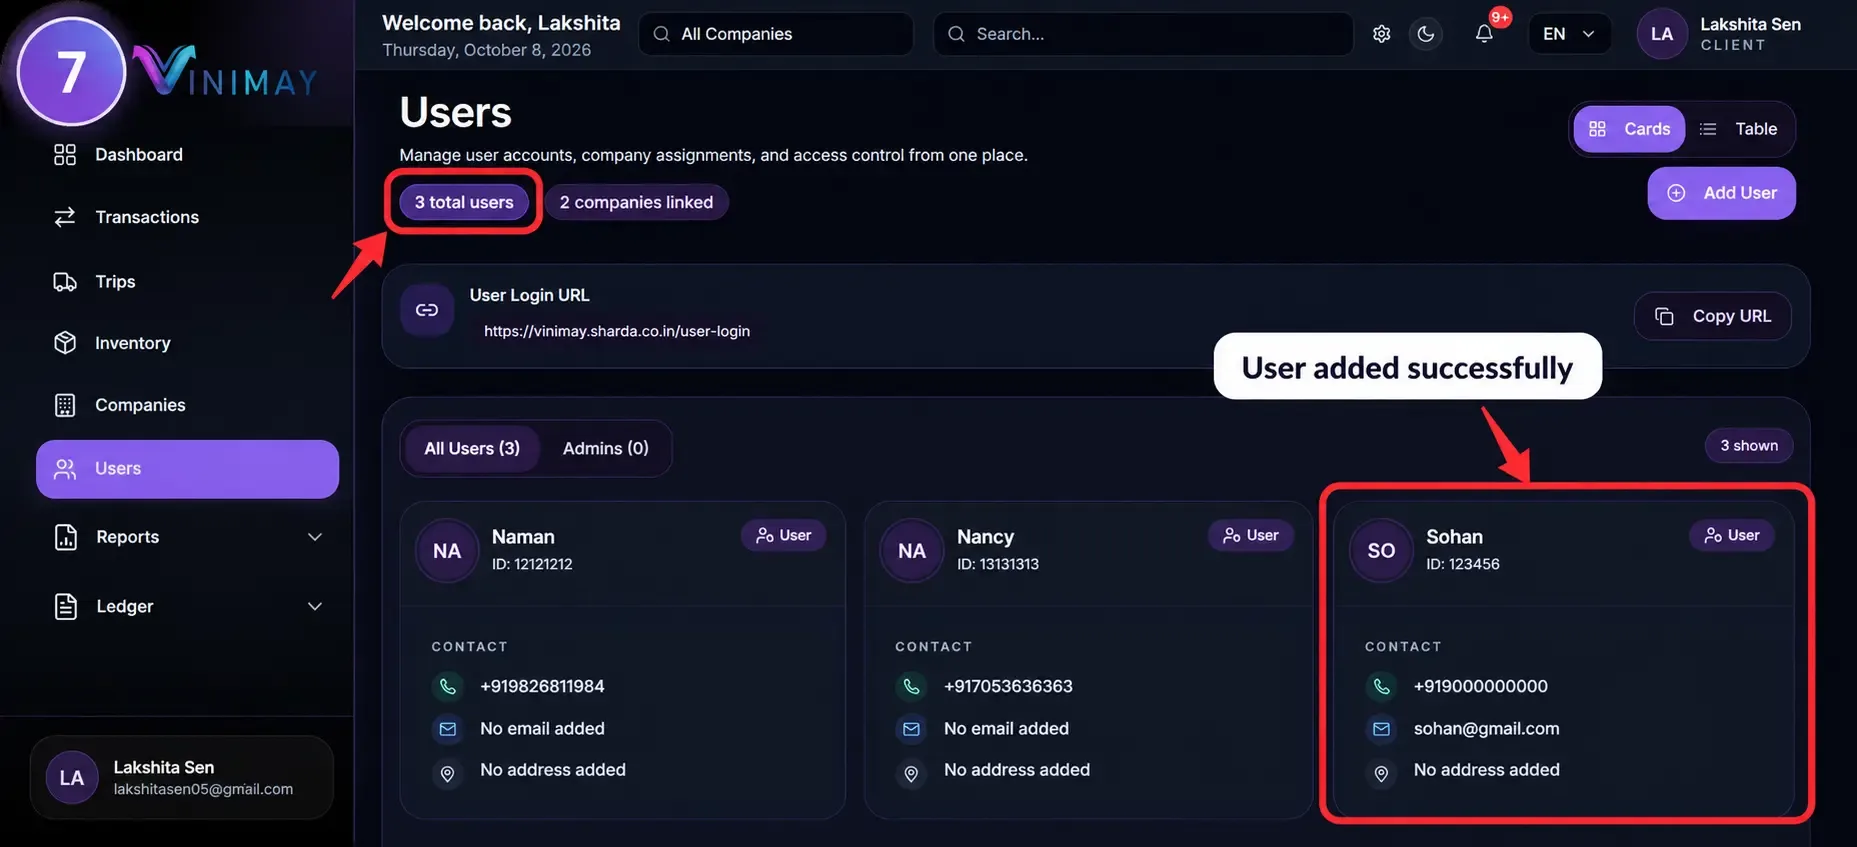
Step 7: Save and Review the Access
Once the role, company, and permissions are selected, click Create User, Save, or the available confirmation button.
After saving, check the user account to confirm that the correct access has been assigned.
Quick Path
Login → Users → Add/Select User → Choose Role → Assign Company → Set Permissions → Save
Using roles and permissions in Vinimay helps you control staff access, protect sensitive business information, and ensure that employees only work with the sections relevant to their responsibilities.
Related Topics
Published by Team Vinimay
Our editorial and compliance specialists create practical guides, tax calculation rules, and operational strategies to empower Indian small business owners and accountants.