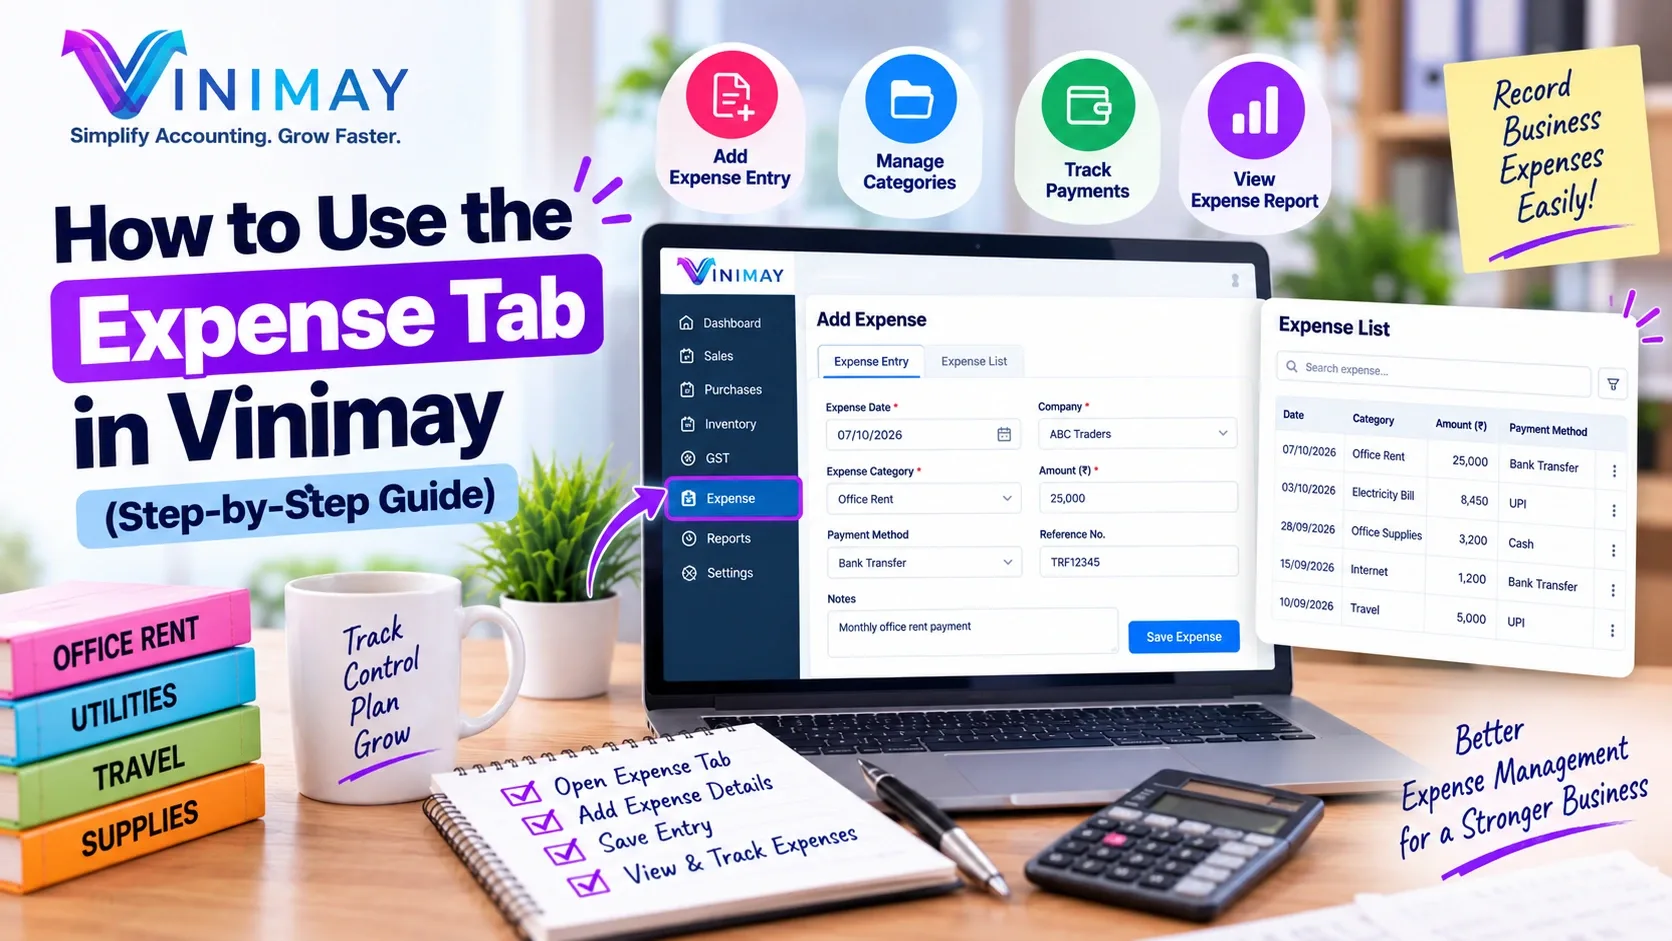
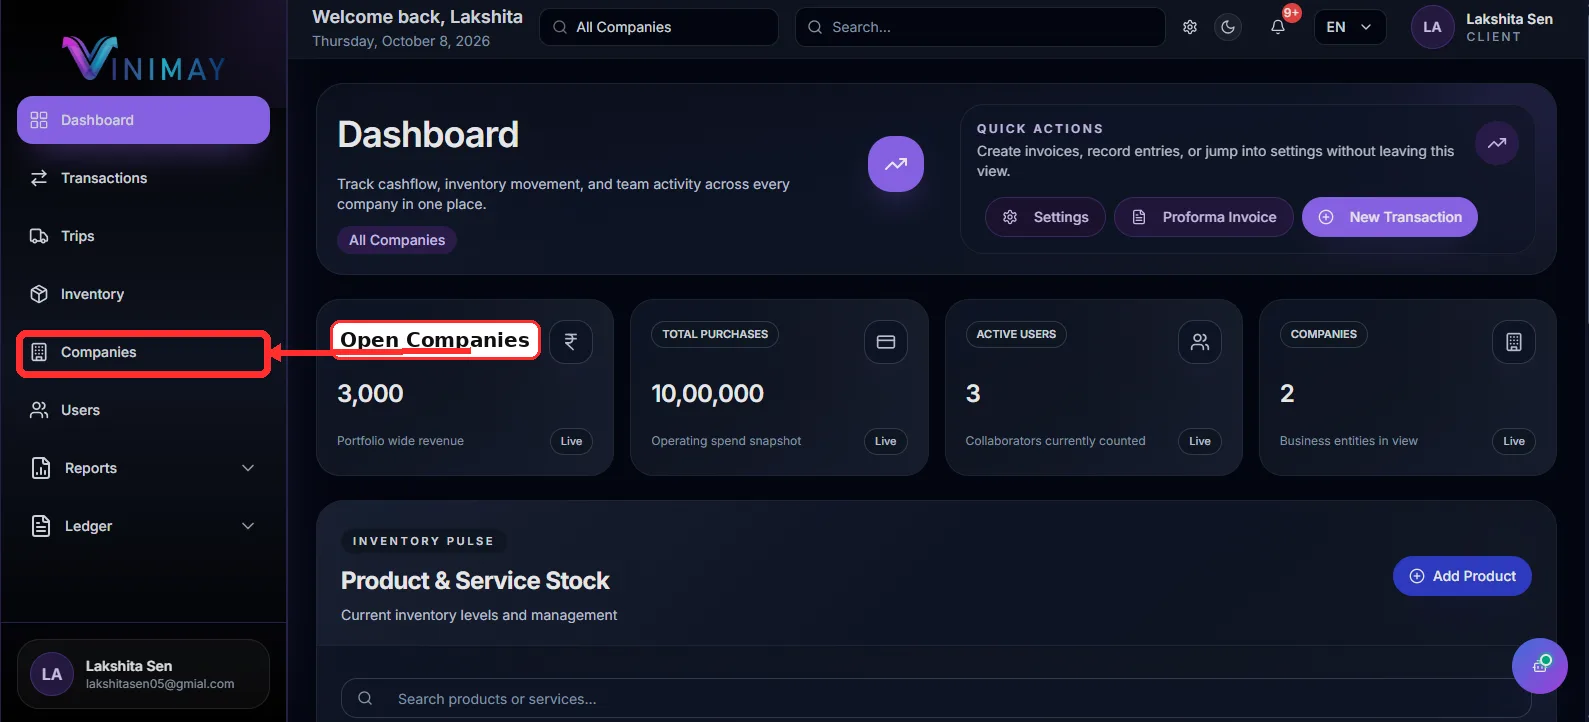
Step 1: Open Companies
First, log in to Vinimay using your registered username and password. After logging in, you will reach the main dashboard, where you can access different business management features.
Look at the navigation menu on the left side of the dashboard and click on Companies. This section allows you to view and manage the companies registered under your account.
Before proceeding, check whether your new restaurant has already been added. If it is not listed, continue to the next step to create a new company profile.
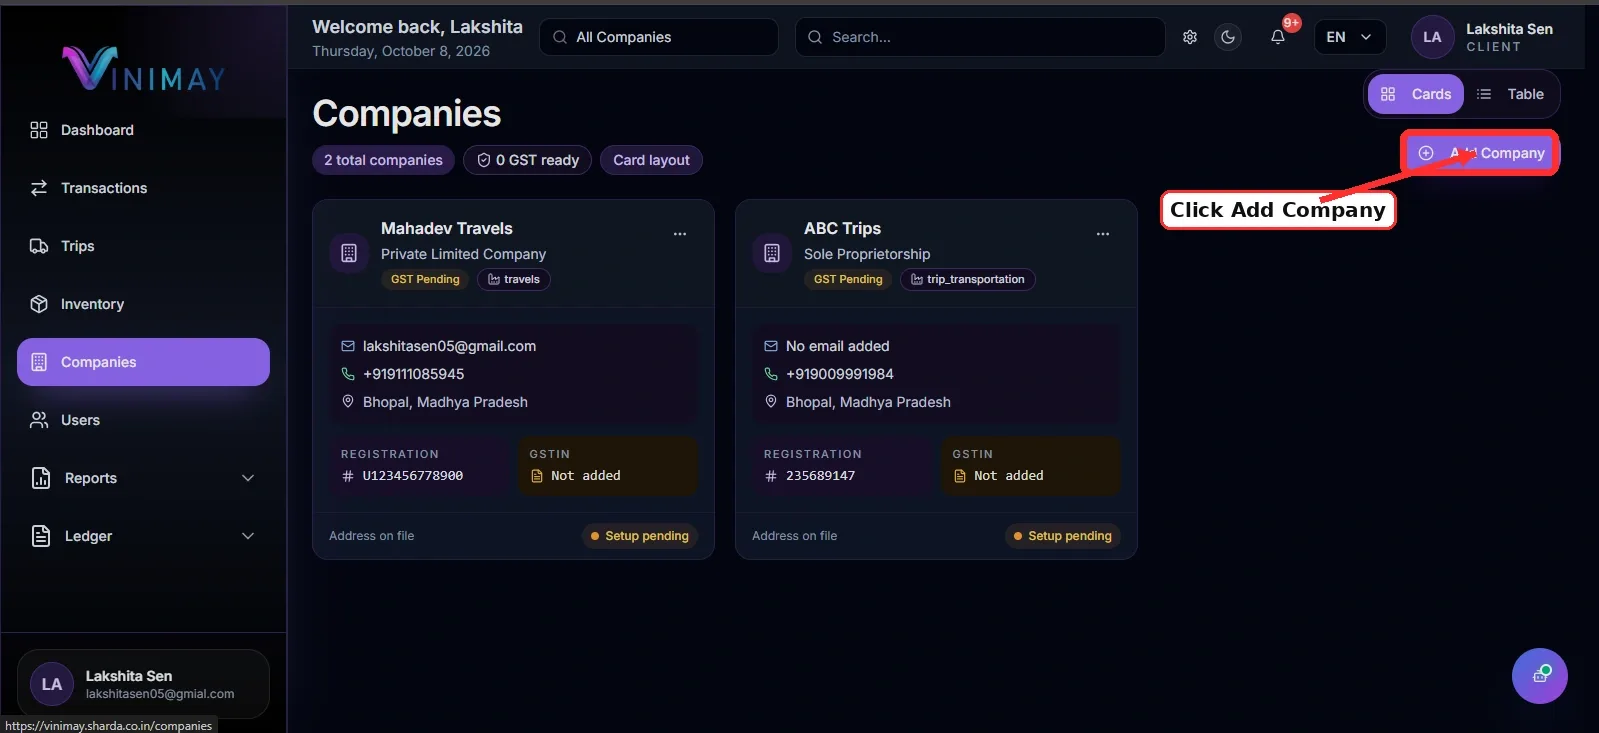
Step 2: Click Add Company.
On the Companies page, look for the Add Company button, usually located in the top-right corner of the screen.
Click this button to open the company creation form. This form allows you to enter your new restaurant's details and configure the basic information required for setting up your business in Vinimay.
Make sure you have the necessary business and registration information ready before filling out the form. This will help you complete the setup smoothly.
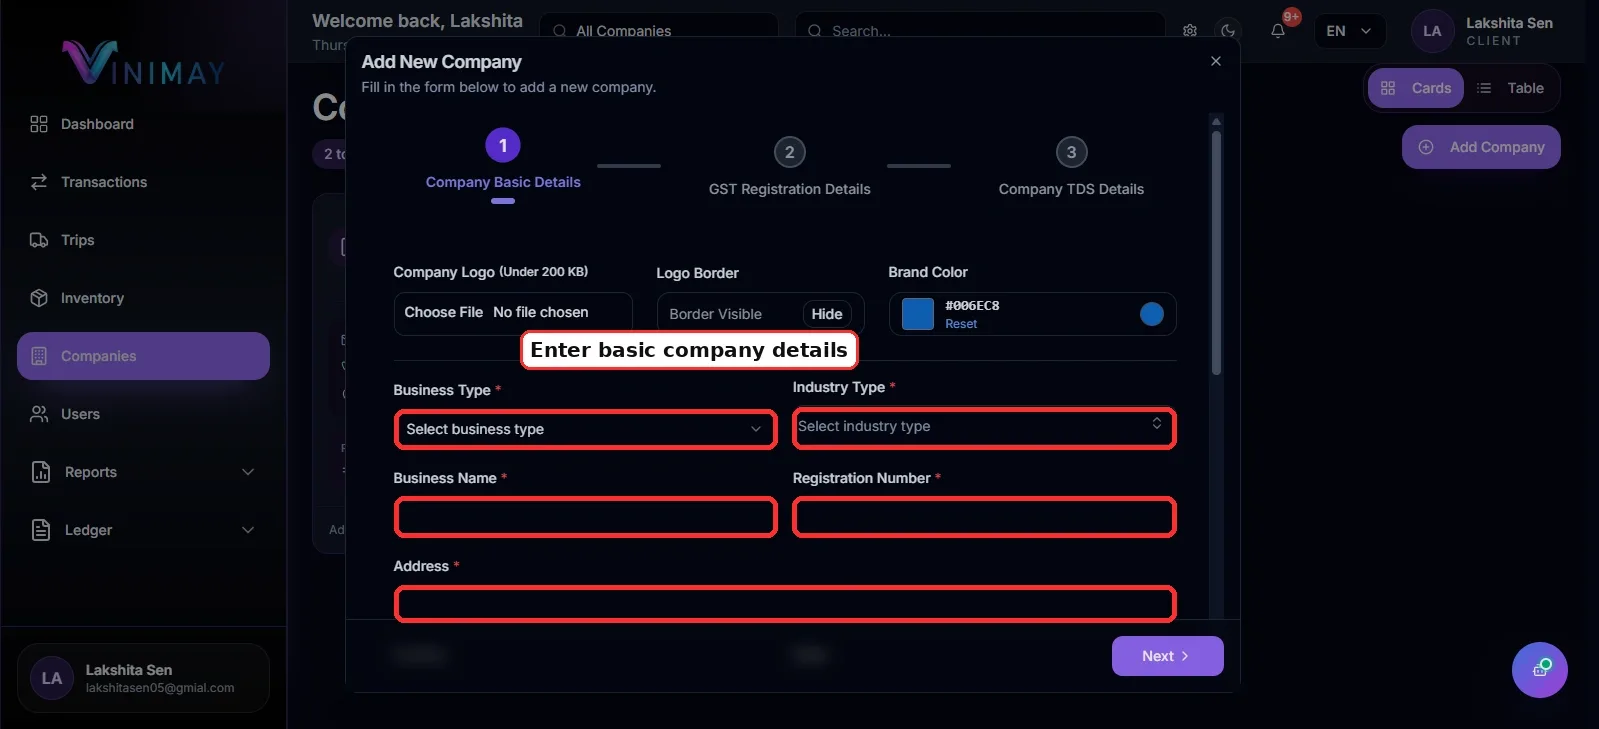
Step 3: Enter Company Basic Details
In this step, provide the basic information required to create your restaurant's company profile. Enter the details carefully so that your business information is recorded correctly.
You may need to provide the following details:
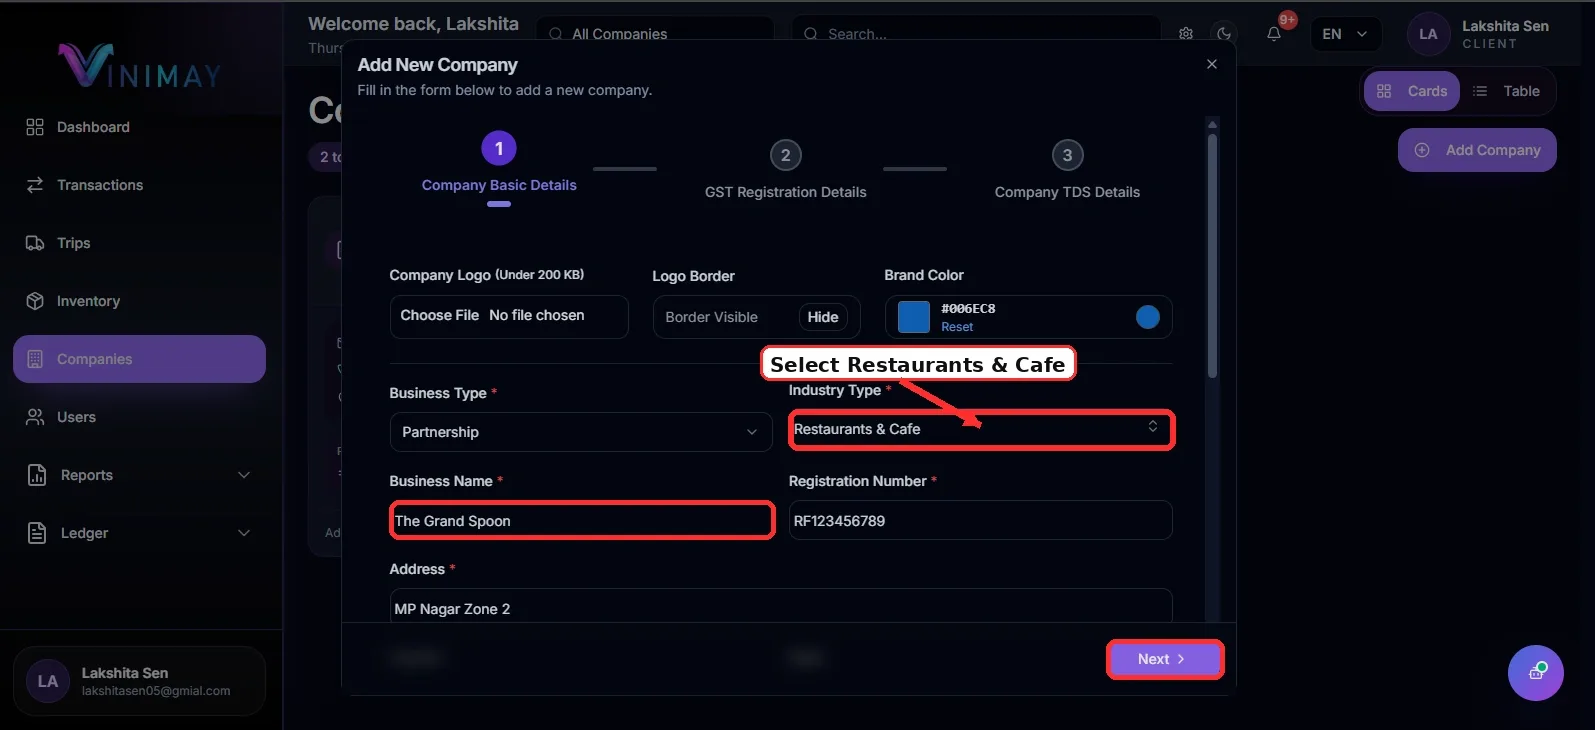
Business Type: Select the appropriate business category.
Industry Type: Choose the industry that best describes your business.
Business Name: Enter your restaurant's official or registered business name.
Registration Number: Provide the applicable business registration number, if required.
Address: Enter the complete business address, including the city, state, and PIN code.
Logo: Upload your restaurant logo if this option is available.
Brand Colour: Select your preferred brand colour if required.
Review the information before proceeding. Accurate details help maintain consistency across your business records.
Step 4: Select Restaurants & Cafe
Under the Industry Type field, select Restaurants & Cafe to identify your business as a restaurant or café.
Enter the new restaurant name and any additional registration details requested on the screen. For example, if your new restaurant operates under the name The Grand Spoon, enter the relevant business name in the appropriate field.
Check that the selected industry matches your business activities. Once you have reviewed the information, click Next to continue.
Selecting the correct industry helps organize your company profile according to the type of business you operate.
Step 5: Enter GST Registration Details
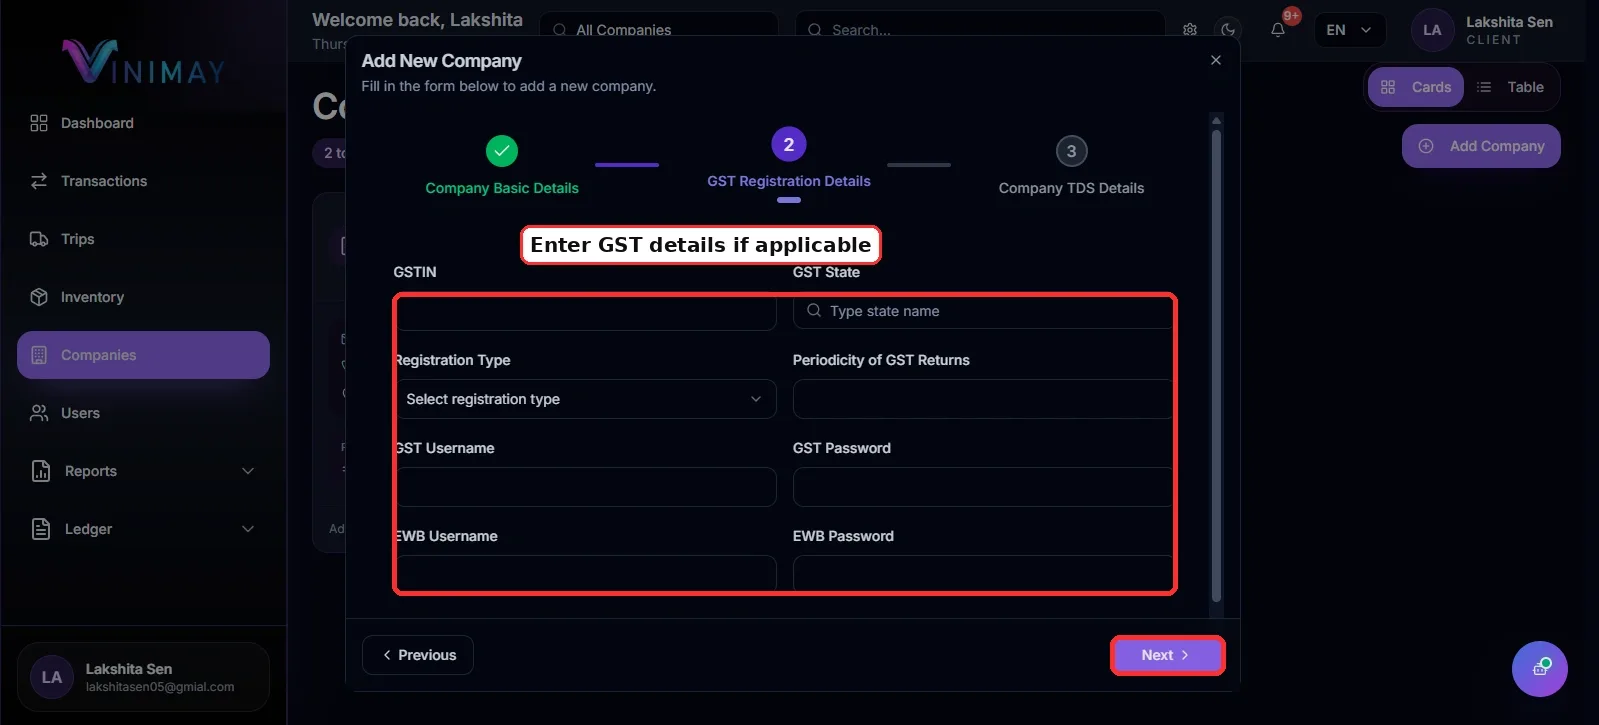
The next screen is the GST Registration Details section. Here, enter your restaurant's GST-related information if applicable.
The form may request details such as:
GSTIN: Enter your valid Goods and Services Tax Identification Number.
GST State: Select the state associated with your GST registration.
Registration Type: Choose the applicable GST registration category.
Periodicity of GST Returns: Select the applicable return-filing frequency.
GST Username/Password: Enter the requested credentials only if the system requires them.
E-Way Bill Details: Provide the relevant information if applicable to your business.
Verify the information against your GST registration records before continuing. If your restaurant is not registered under GST or certain details do not apply, follow the options provided by Vinimay rather than entering incorrect information.
Step 6: Enter TDS Details and Create Company
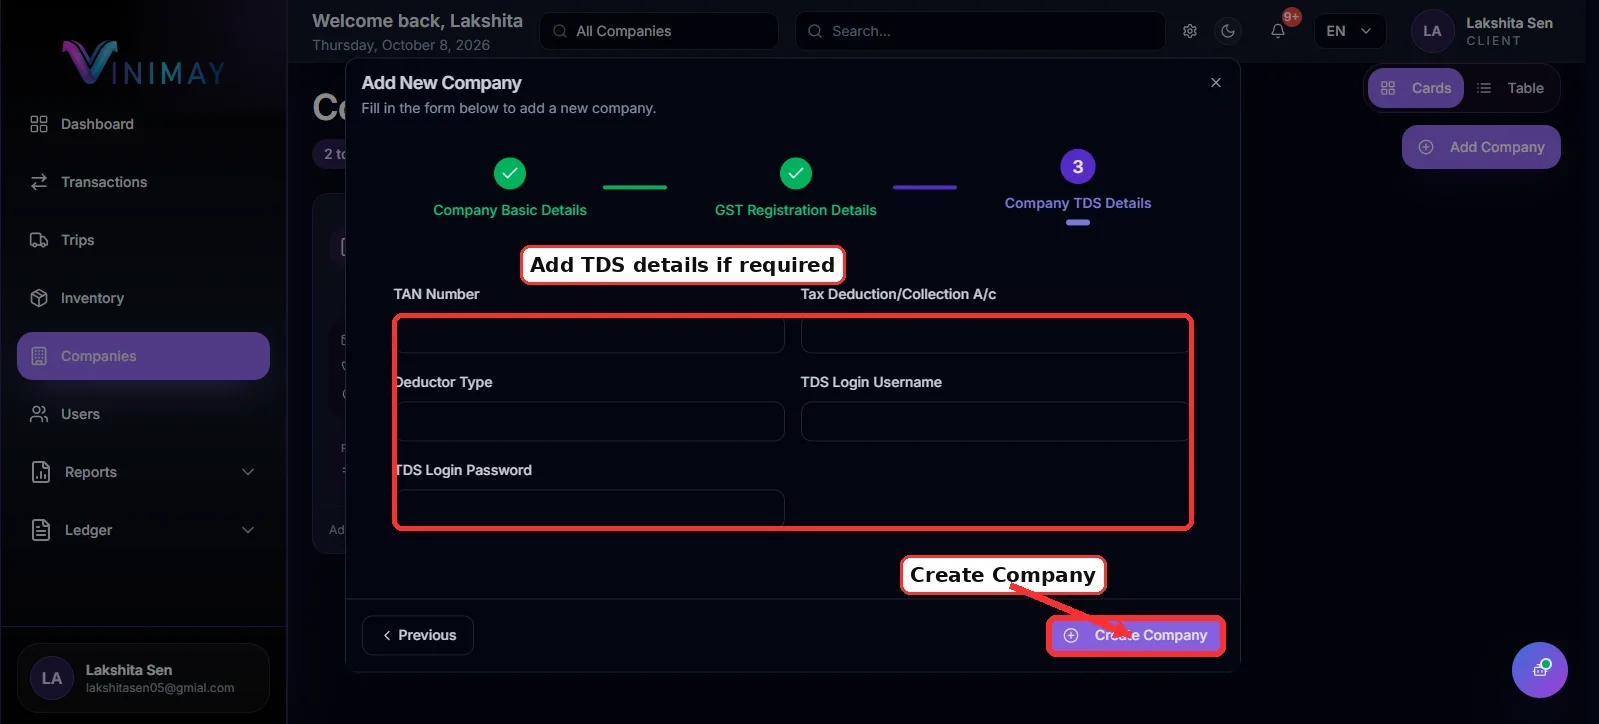
Next, open the Company TDS Details section. This step allows you to enter Tax Deducted at Source (TDS) information, where applicable.
Depending on your business setup, the form may ask for:
TAN Number: Enter the Tax Deduction and Collection Account Number, if applicable.
Deductor Type: Select the appropriate category for your business.
TDS Login Information: Provide the requested information if needed.
Review all the details before submitting the form. Once everything is complete, click Create Company to submit your restaurant's information.
If certain TDS details are not applicable, follow the available instructions in Vinimay.
Step 7: Confirm the Restaurant Is Added
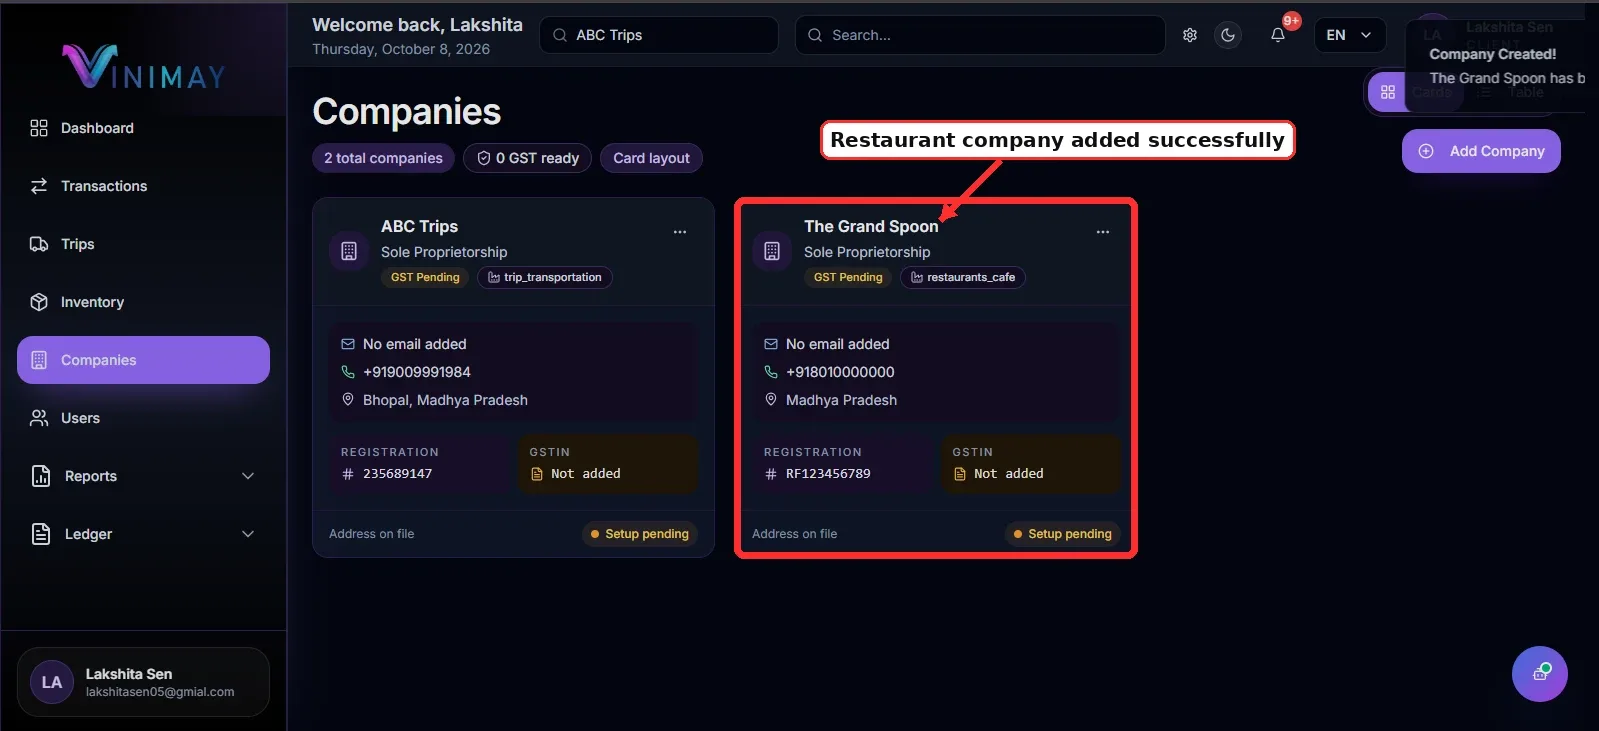
After submitting the form, return to the Companies page and check whether your new restaurant appears in the list.
For example, if you created a restaurant named The Grand Spoon, you should be able to find it in the company list. The restaurants_cafe tag shown alongside the name can help confirm that the restaurant was categorized under the selected industry.
If the restaurant appears correctly, your company creation process is complete. If it does not appear, check for any error messages or incomplete fields and follow the instructions displayed in Vinimay.
Quick Path to Add a Restaurant
Login → Companies → Add Company → Enter Basic Details → Select Restaurants & Cafe → Add GST Details → Add TDS Details → Create Company → Confirm Restaurant Added
What to Do After Adding Your Restaurant
Once your restaurant has been created, you can proceed with the next setup activities available in your Vinimay account. These may include adding menu items, creating tables, assigning staff members, configuring inventory, and organising other restaurant operations.
Completing these activities helps prepare your restaurant account for day-to-day business management.
Related Topics
Published by Team Vinimay
Our editorial and compliance specialists create practical guides, tax calculation rules, and operational strategies to empower Indian small business owners and accountants.