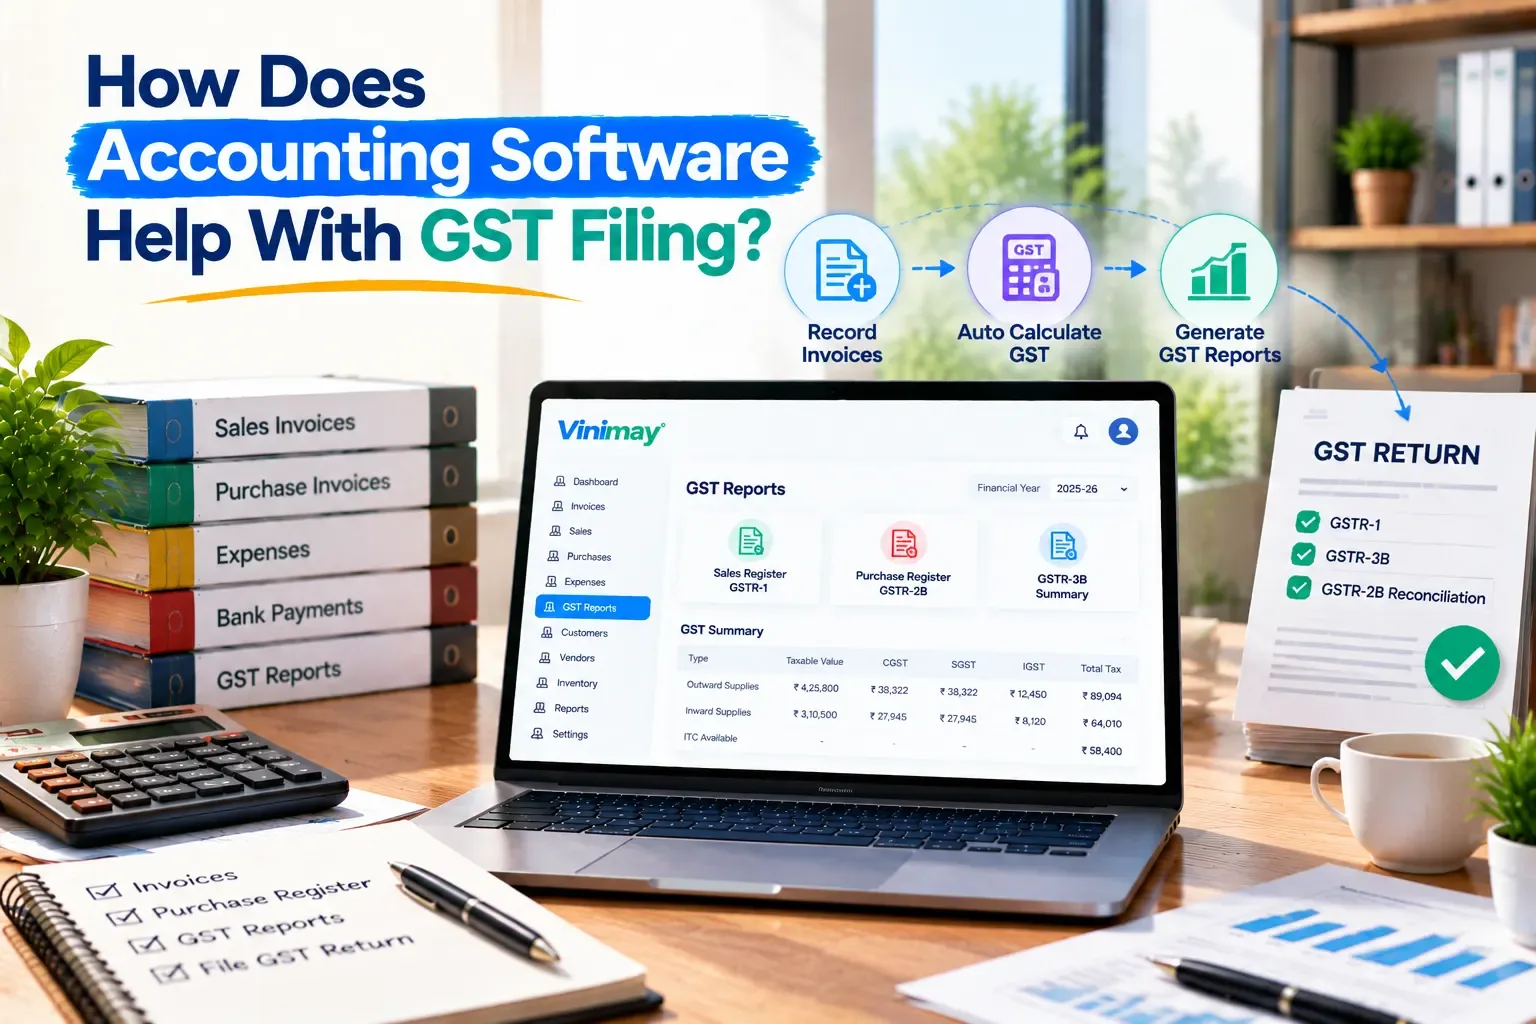
Client Login vs User Login in Vinimay is the key difference every business owner should understand before giving software access to employees or accountants. Instead of sharing one main login with the entire team, Vinimay allows the primary account holder to use Client Login while staff members use separate User Login credentials based on their role and assigned company. This makes user access easier to manage and helps businesses keep their accounting workflow organised.
In this guide, you will learn the complete difference between Client Login vs User Login in Vinimay, when to use each login, how to create a new user, assign a role and company, copy the User Login URL, and how the employee can sign in step by step.
What Is Client Login in Vinimay?
Client Login is the primary login used by the business owner or main account holder.
A client can use Vinimay to manage different areas of the business, including transactions, inventory, companies, users, reports, ledgers, and other features available for the account.
The biggest difference is that a client can create separate users for employees instead of sharing the main Client Login credentials with the entire team.
Step 1: Open the Vinimay Login Page
Open the Vinimay login page.
You will see two options at the top of the login form:
Client Login and User Login.
If you are the business owner or main account holder, select Client Login.
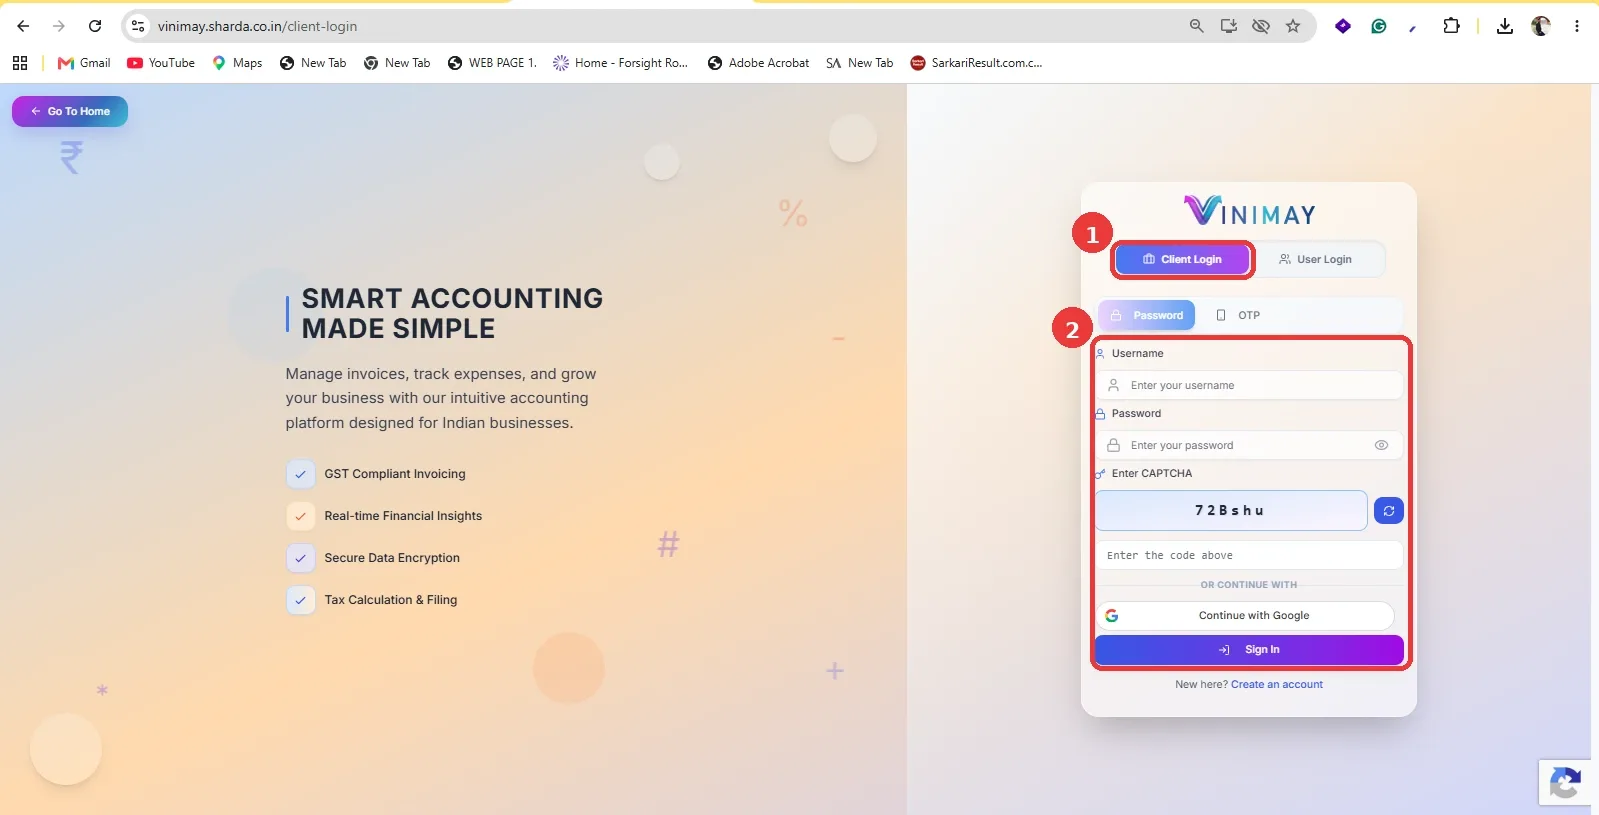
Select the Client Login tab when you want to access the main business account.
Mark 2 – Enter Login Details
Enter the required information, such as:
- Username
- Password
- CAPTCHA
After entering the details, click Sign In.
Depending on the available login options, the client may also see OTP or Google login options.
Step 2: Open the Users Section
After successfully signing in through Client Login, the Vinimay dashboard will open.
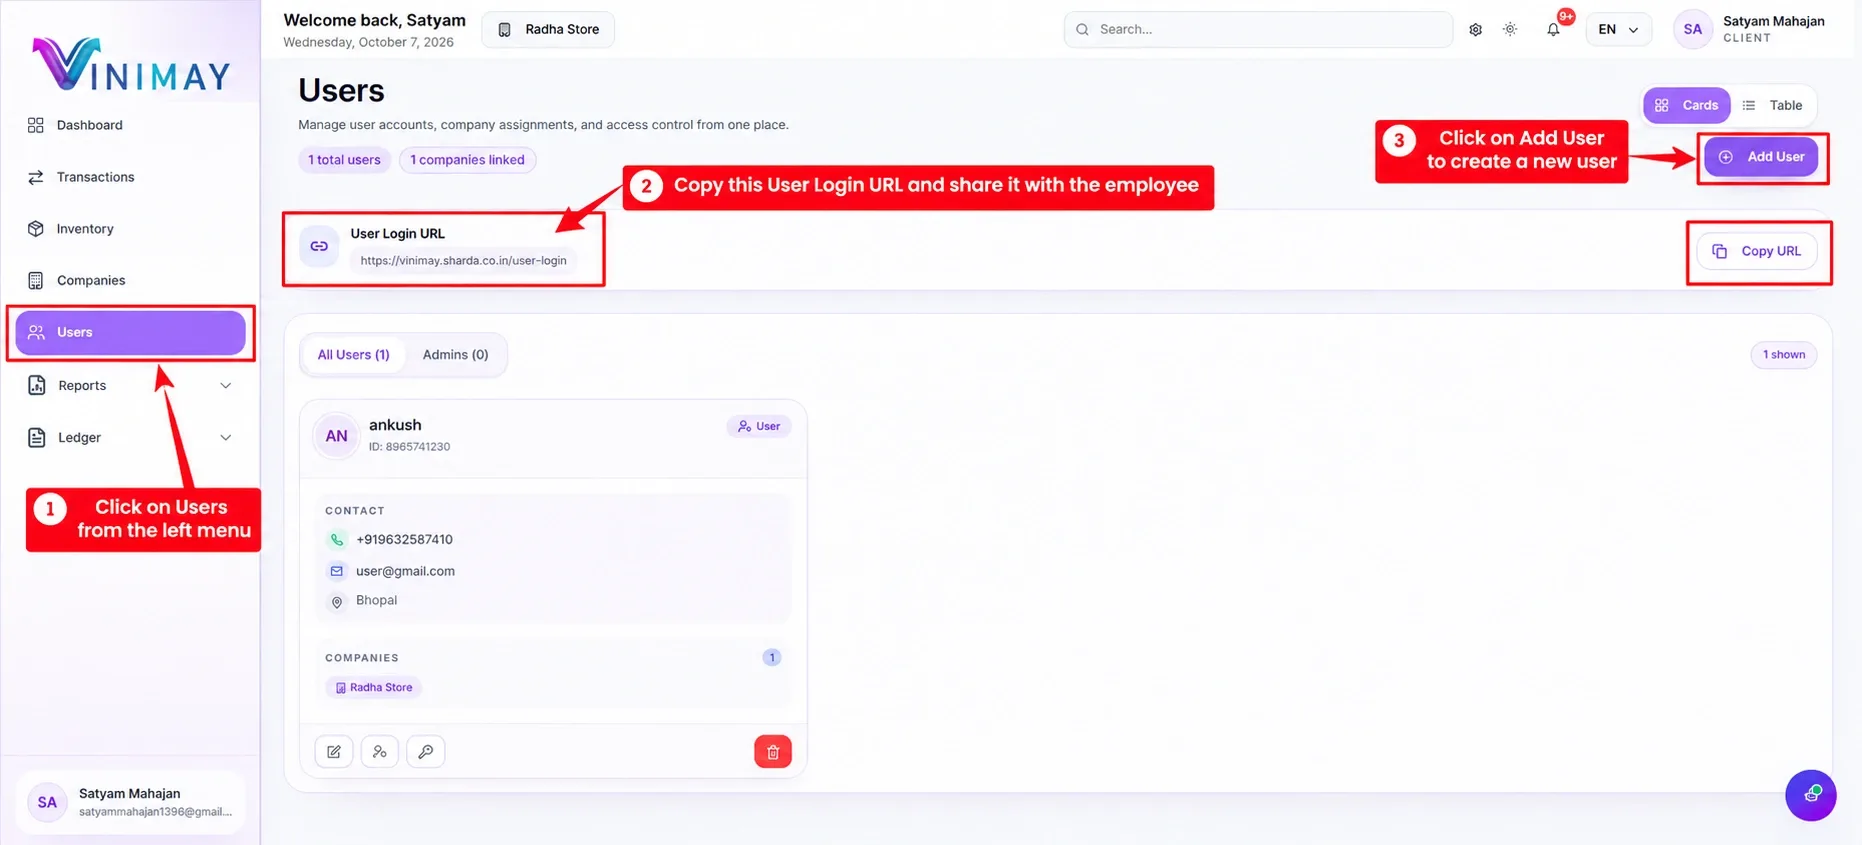
On the left-side navigation menu, click Users.
The Users page is the main place from where the client can create and manage employee accounts.
On this screen, you can see information such as:
- Total users
- Number of companies linked
- Existing users
- User role
- Contact details
- Assigned companies
- User Login URL
- Add User button
This means you do not need to give your main Client Login password to every employee.
Instead, create a separate account for each authorised person.
Step 3: Click “Add User”
To create a new employee account, click the Add User button available at the top-right side of the Users page.
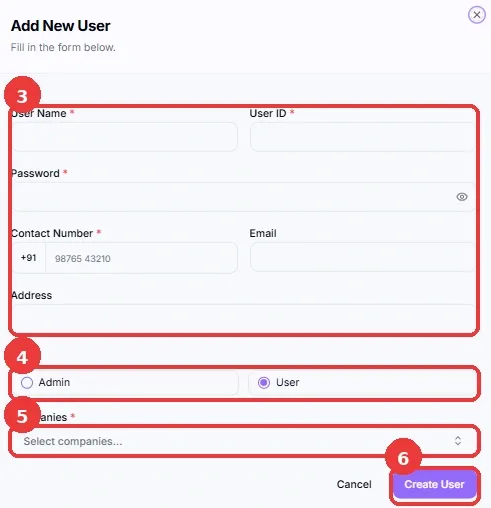
After clicking it, an Add New User form will open.
This form allows the client to create separate credentials for an employee, accountant, billing executive, manager, or other authorised person.
Mark 4 – Select the Role
The form provides role options such as:
Admin
or
User
Choose the role according to the person's responsibility in the business.
For example, a senior authorised team member may be assigned an Admin role if appropriate, while a regular employee may be added as a User.
The exact access available to each person can depend on the permissions configured for that account.
Admin vs User Role
The role should be selected carefully.
Admin
An Admin may be suitable for an authorised senior employee who needs broader access according to the permissions assigned by the business.
User
A User role may be more appropriate for regular employees who only need access to specific business functions.
For example:
A billing employee may need invoice-related access.
An inventory employee may need access to products and stock.
An accountant may need access to accounting records and reports.
The objective is to give employees the access they actually need instead of giving everyone complete account access.
Step 4: Copy the User Login URL
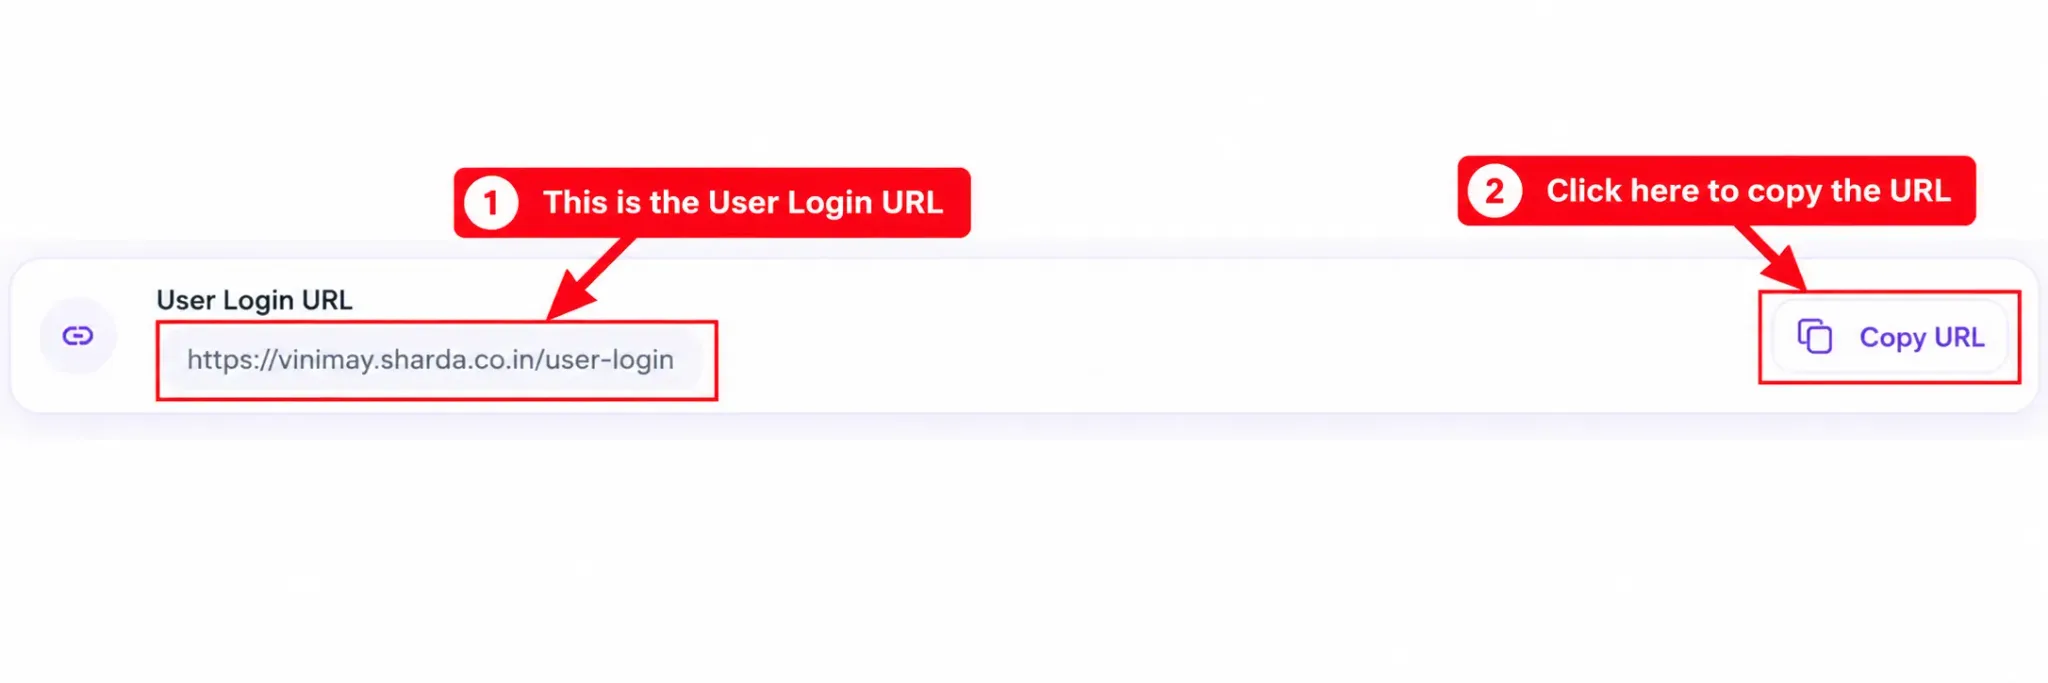
At the top of the Users page, Vinimay provides a separate User Login URL.
In your screenshot, the URL is:
https://vinimay.sharda.co.in/user-login
There is also a Copy URL button.
Click Copy URL and share this login page with the authorised employee.
The important point here is that the employee does not need the Client Login page or the owner's main password.
The user has a separate login route.
Step 5: Open the User Login Page
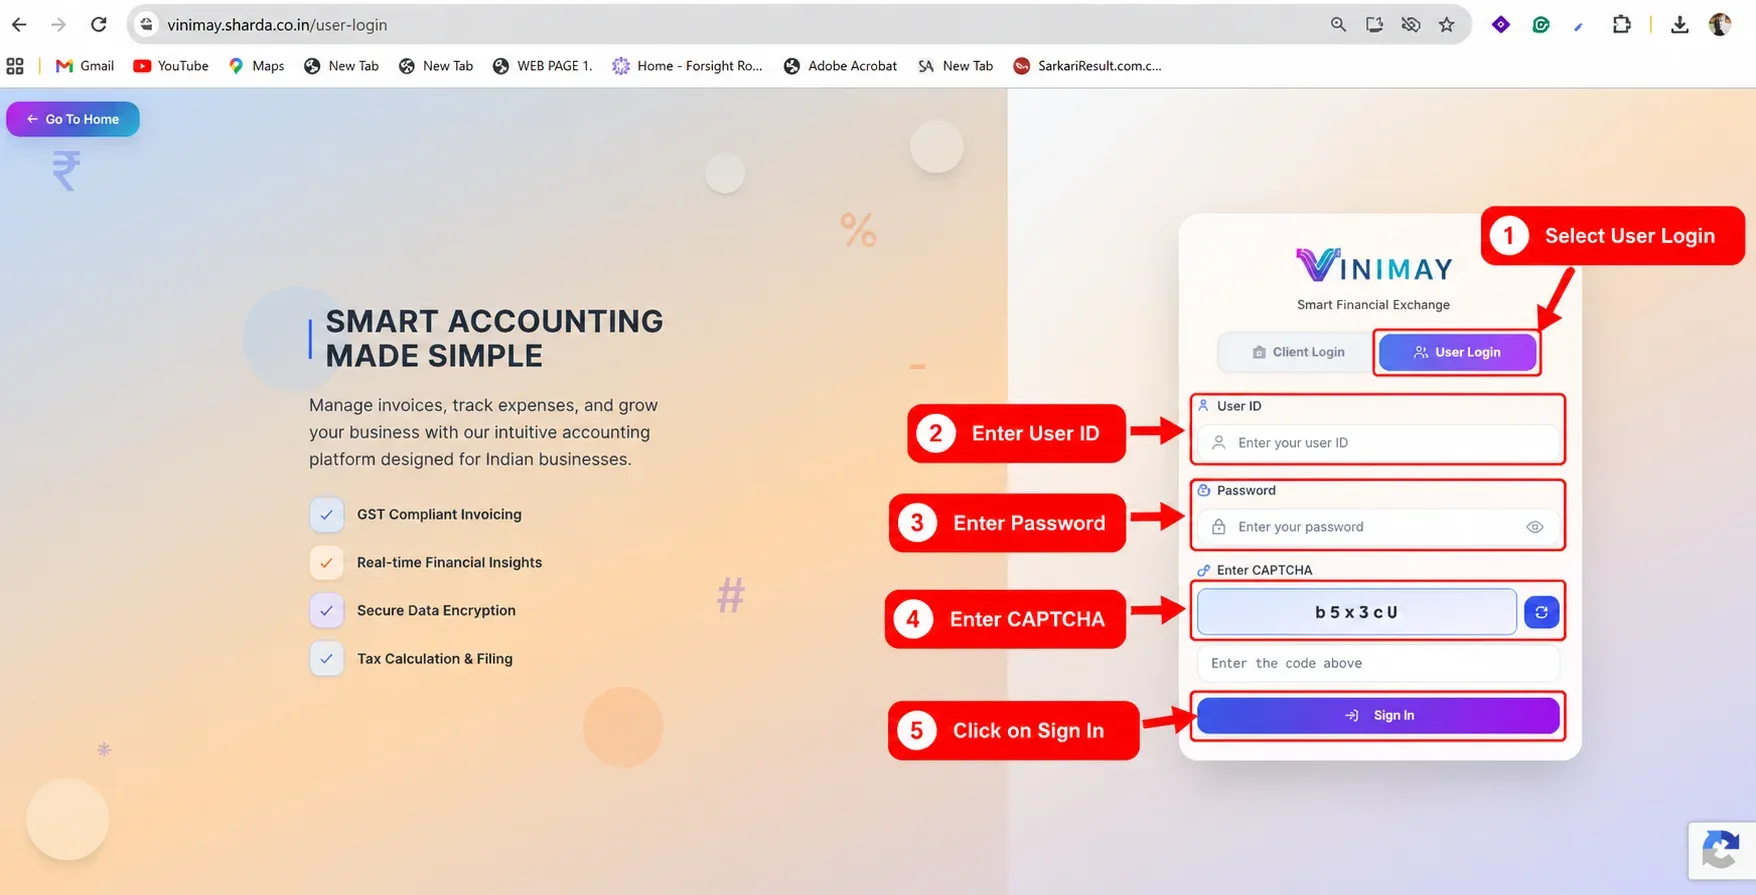
When the employee opens the User Login URL, a login screen will appear.
At the top of the form, they will see:
Client Login
and
User Login
The employee should select User Login.
The User Login screen is different from the primary Client Login because it asks for the credentials created specifically for the employee.
Related Topics
Published by admin
Our editorial and compliance specialists create practical guides, tax calculation rules, and operational strategies to empower Indian small business owners and accountants.